From at least the early 20th century, and especially since the emergence of the Studio Furniture movement, most furniture makers who use shop marking to identify squared faces and edges of boards and to differentiate and orient carcase and drawer parts, have removed these marks from their finished products through planning, erasure, or other means. This was not the case in the 17th and 18th century; shop marks made with chisels, gouges, pencils, and chalk can be observed on the majority of furniture made before the 20th century. They were accepted by makers and consumers alike as part of the making process as much as the marks left by planes and saws on wood surfaces.
Whether learned from their master or developed on their own, joiners and cabinetmakers had diverse methods of marking parts of furniture. “BOTTOM” written on the outside surface of the bottom board of a carcase is a commonly seen mark on historic furniture. Today this mark is easily understood, even by someone with no training in furniture making. Other marks can be baffling, a puzzle to those who have no connection to the trade. Marks on drawer sides and backs in furniture documented and attributed to the shop of John Head have confounded observers who are surprised by their boldness, variety of shapes, and seeming randomness. But examination of multiple chests of drawers from the shop shows there was a method and structure to the marks that, like other workshop practices in Head’s shop, contributed to the efficiency of making.

In order to understand the marking system we need to first understand that the shop is simultaneously making drawers that are the same height as well as drawers of varying heights. Those two groups needed to be differentiated. Read on for an explanation of the shop markings on drawers from John Head’s shop.

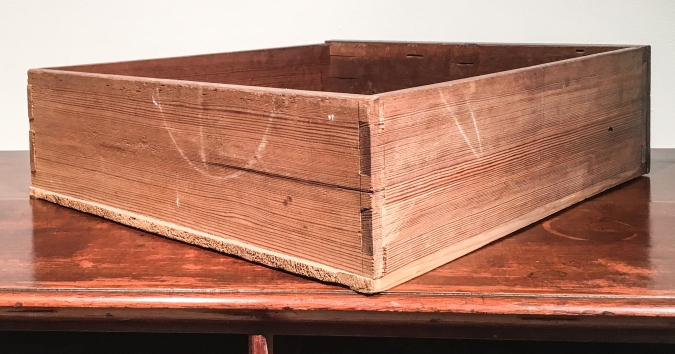
The placement of the marks on drawers of furniture documented and attributed to the John Head shop do not vary. They are always placed on the exterior surfaces of backs and sides – at the center of backs at the top edge, and the at the rear of the sides, also at the top edge. The long drawers at the left in the above image have a half-circle with a vertical slash on the backs. The drawers at the middle of the image have a half-circle mark without the slash. This is one method, making slight variations of the marks, by which multiple chests of drawers being made at the same time could be kept separate.

Marks on the sides of the long drawers could be similar from drawer to drawer because drawer parts could be easily identified by their different heights. In the above image, all three long drawers from the same chest have V marked on one side. What the mark was – its shape or design – was unimportant, what was important was its placement at the top rear on the exterior surface. The reason for this is discussed below.

In the above image, the proper right drawer in the top tier of a chest of drawers attributed to John Head’s shop has chalk shop marks at the same locations as seen in the previous images.
It is imperative that the marks on the proper left drawer of similar height in the same chest be completely different from the marks on the same size drawer as the drawer parts would not be interchangeable during joint cutting or assembly. It doesn’t matter what the marks are – only that there are different marks on the corresponding parts of same size drawers.
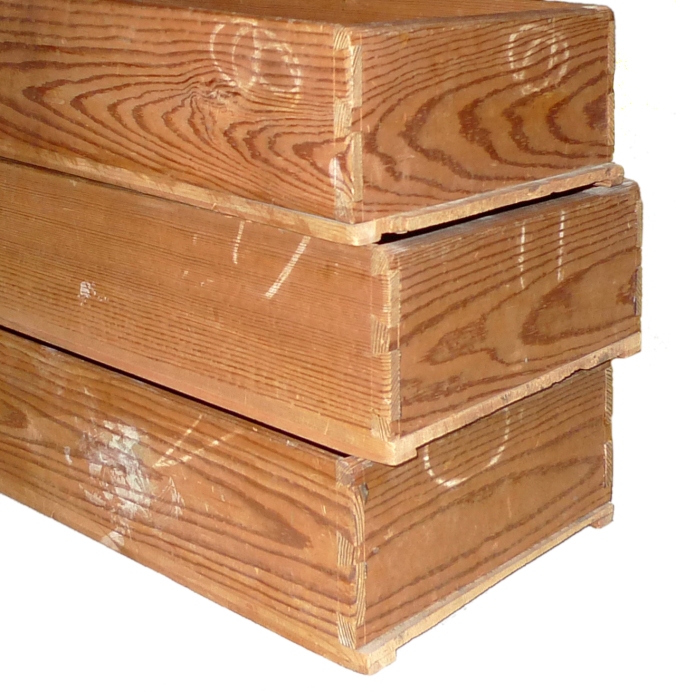
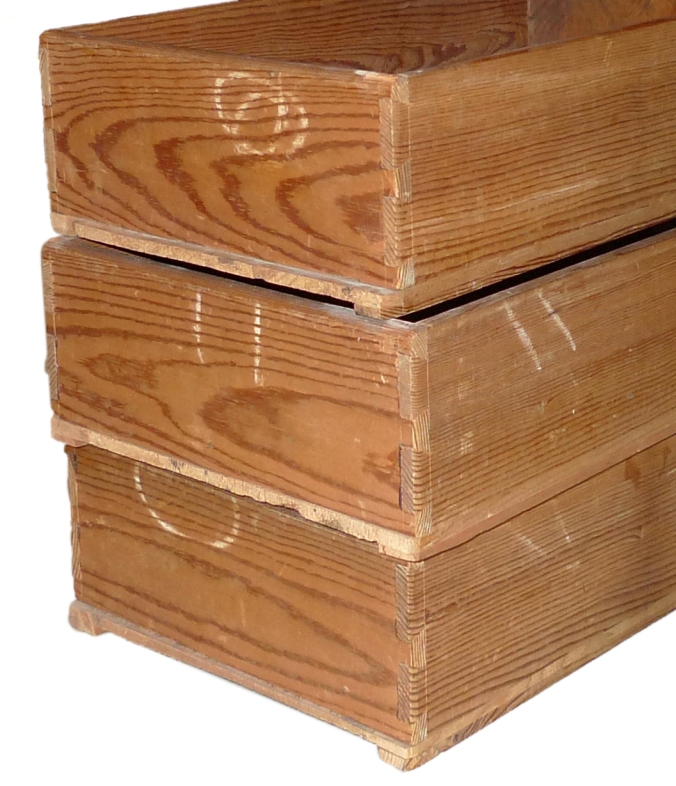
Views of both sides of three drawers of the same height from the same chest show how this system works. The marks on each side of a single drawer are identical but each drawer uses a different mark on their backs. The drawer on top has a complex circular design, the mark on the middle drawer is a double slash, and the bottom drawer has a half-circle mark. The marks on the backs of the similar sized drawers must be different, unlike the long drawers of different heights seen in the images above, where every drawer had the identical mark on the back. Head routinely paired side V marks with half-circles on the back and has done that here on the bottom drawer. On the other two drawers, the same mark on the sides is used on the backs.
Head’s shop only needed a limited set of marks to identify drawer parts using this system. A V, a double vertical slash, a half-circle, a half-circle with a vertical slash, and a complex circular design. These marks, their design and placement, are one of the characteristic features that must be present for an object with drawers to be attributed to the shop of John Head.

The marks on drawers from Head’s shop show how parts for individual drawers were kept distinct and they also give insight to the Head’s working method. The placement of the marks reveal that the exterior surface and upper edge of drawer sides and backs were registration surfaces. When woodworking with hand-tools, typically a face and edge of a board are brought to square and marked, sometimes with a mark on both face and edge, and sometimes as Head did, with the face mark placed adjacent to its squared edge. Placing the marks on the exterior surfaces of the drawer parts towards the back of the drawer ensured they would not be visible when the drawer was ultimately in use by the consumer.

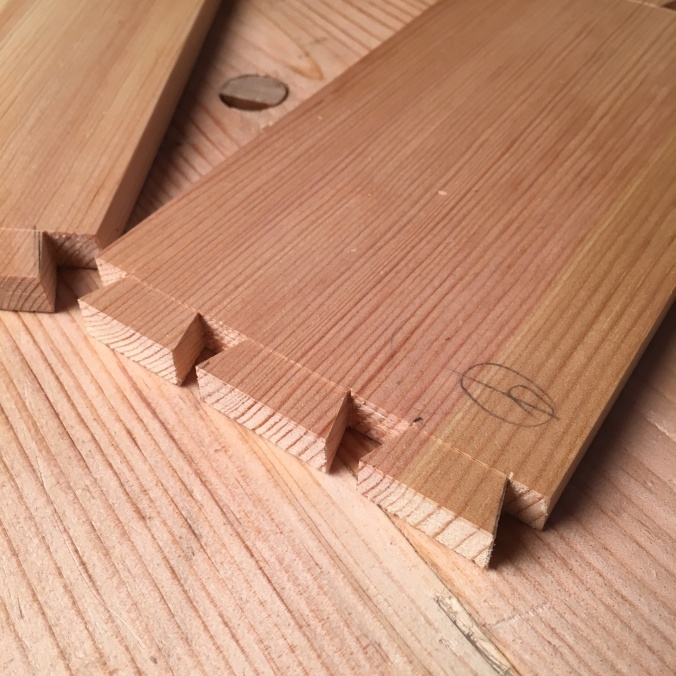
Many woodworkers mark and cut dovetail joints with the exterior, or show, surface facing them. This mark placement gives you the advantage of always knowing what drawer part you’re working on and how it will be oriented during assembly. In the image above, the V mark tells me that I have a side piece in the vise – not a back, whose marks are always at the center – that I have correctly laid out the dovetails on the show surface, that I’m cutting the dovetails at the back of the drawer, and that the top edge of the board is to my right. A lot of information from a single chalk mark. (A penciled V in this case.)
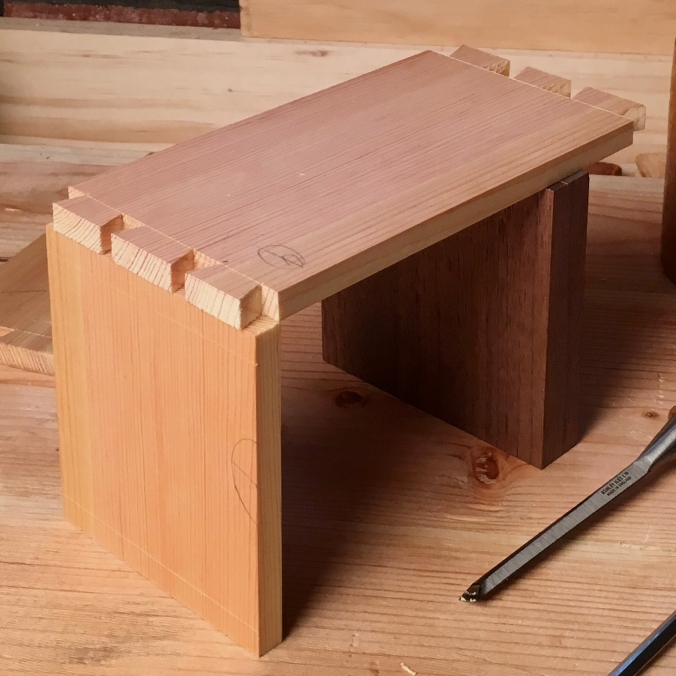
The cuts to be made in the back and front for the dovetail recesses are transferred from the dovetails cut at the ends of the sides. The shop marks make orienting the parts during this process easy to accomplish. While reproducing a drawer from the spice box attributed to Head, shown in the image above, I instantly knew how to orient the back of the drawer and which side piece to place on it to mark the dovetails (Undoubtedly, the hardwood drawer fronts were also marked, but the marks would be removed prior to finish being applied.)
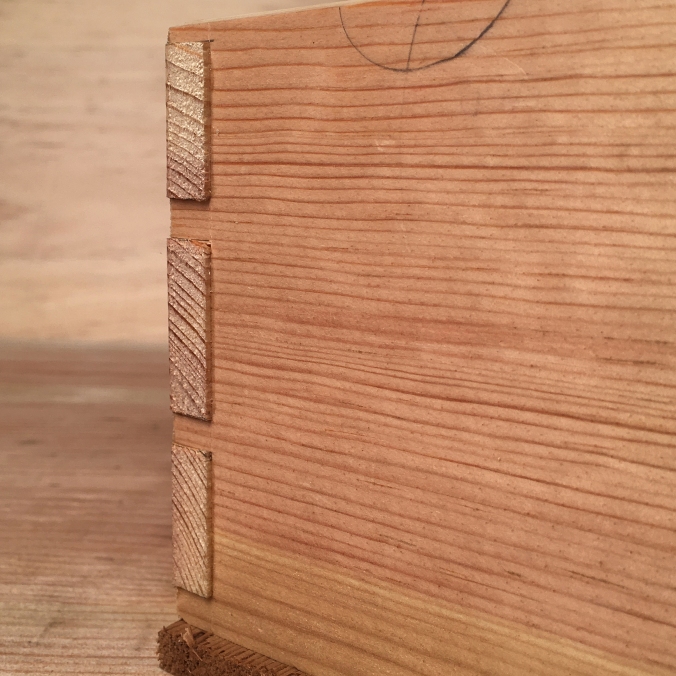
At a glance, I can tell the drawer part in the image above is a side, that it’s the proper left side, and that I’m looking at the dovetails that are fit to the back of the drawer, not the front. I also know which edge to round over before assembly.
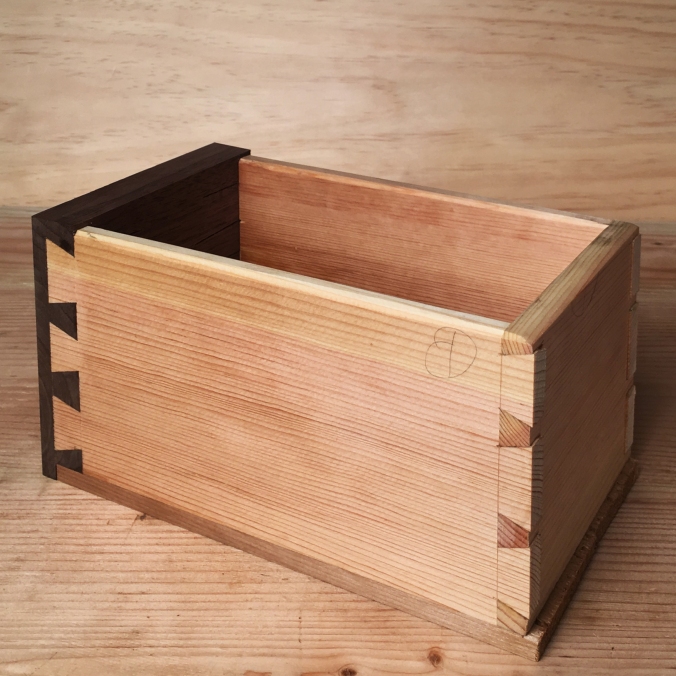
Drawer parts were somewhat loosely fit to their openings in a carcase while the drawer front was carefully trimmed, allowing for only a slight gap around the opening. The front and back were joined to the sides such that they extend just slightly past dovetails, the dovetails of the sides extend at least a sixteenth of an inch past the back with glue squeeze out often visible. Head did not plane the exterior surfaces of his drawers to clean them up or to fit them to the carcase. That was an extra step Head, and most of his contemporaries, would likely have considered a waste of valuable time. Due to this way of working, the shop marks survive and a methodological system of marking that would have been lost, can today be reclaimed. This way of marking drawers belongs to woodworking history but it is also a technique that works extremely well, is easy to teach and learn, and can be used by cabinetmakers today as another way to introduce efficiency in the process of drawer making.
Make a mark – leave a mark.

Again, a well observed and useful post Chris.
I see chalk, pen and pencil marks on British and Irish furniture.
I use chalk throughout the building process from rough sawn boards to veneers etc.
JP
Jack, thank you for your comment. I hope you read an edited version! Tidied up a bit for clarity and typos.
White chalk is a good choice, it shows clearly on rough and planned boards but is easily removed if needed. The variety of of writing implements and ways of marking parts in these early days is an interesting study. Making multiple drawers for cabinets and chests was was still a relatively new process for British joiners at the time of Head’s apprenticeship.
Chris
Pingback: “To a Walnut Dask” Part I | In Proportion to the Trouble
Pingback: To an Oval Table | In Proportion to the Trouble
Pingback: Carving Tool Resolutions | In Proportion to the Trouble