One of the things I’m hoping to accomplish with this series of posts is to give a broader understanding of the amount of labor (as well as imagination and technical ability) – hence cost to the consumer – that is required to create the objects illustrated in the previous post with the complex light-wood sting and dot designs inlaid on their drawer fronts and tops. They were by far the most expensive and ornamental objects of their forms made in the Philadelphia area during the first quarter of the eighteenth century. But I know that most who have either historic interest in, or collect this material, have no way of appreciating the extraordinary work that went into making these objects. Social historians also can benefit from a better grounding in the details of this work to inform discussions of taste and consumer desires.
Scholarly publications either do not attempt to describe the processes used to create the inlay or give inadequate or just plain wrong information about the process. There are however plenty of us who are furniture conservators, restorers, and reproduction woodworkers who are accomplished in this work and have reconstructed the means to produce this type of line-and-dot work. I will first mention my friend and colleague Steve Latta who teaches furniture making at Thaddeus Stevens College in Lancaster, Pennsylvania. After years of training himself in the techniques of inlay work of the eighteenth century, in the mid-2000s he collaborated with Lie-Nielsen Toolworks to manufacture a set of modern stringing inlay tools. He also made a DVD about their use and maintenance for Lie-Nielsen. The tools and DVD have not been available for some years, but the video is still offered for streaming at a cost of $40 on the Lie-Nielsen site. Additionally, at the recent Sotheby’s auction of the William K. du Pont Collection, attendees were able to view the replaced lid of the Montgomery family desk and bookcase that shows the ability of contemporary furniture restorers to reproduce line-and-dot work of the mid-eighteenth century and integrate it seamlessly onto an historic object.

In the last post I illustrated seven objects I speculate may represent a Philadelphia, or a Philadelphia area, school of line and dot inlaid furniture. One of several defining characteristics of the inlay is the use of clusters of four dots in combination with single inlaid dots. Clusters of four dots are not present on any furniture documented or attributed to Chester County, Pennsylvania. (Single dots were used by some makers in Chester County. A line-and-dot scriptor made circa 1710 in New York City employs clusters of four dots throughout. This will be a subject of a future post.)
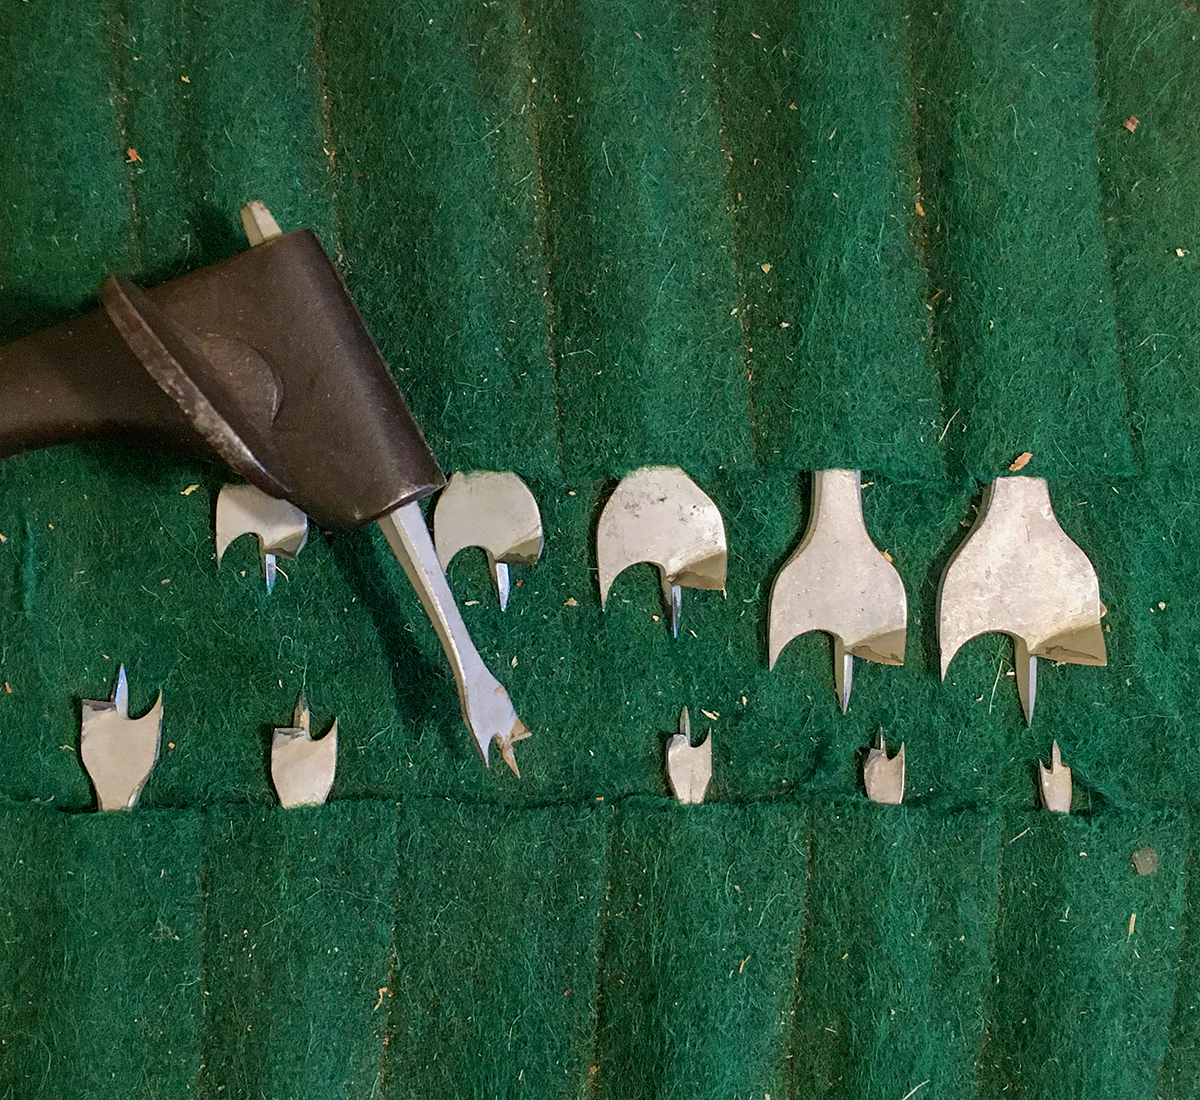
After a joiner formulated a draft of the inlay, the design would be transferred to the drawer front or top. The straight-line stringing that formed a border on the drawer fronts and top would be lightly cut in but probably not inlaid as often the pivot point for the radiused stringing fell on the these border lines. The radiused stringing designs would then be cut and inlaid along with the border stringing and last, the dots would be inlaid. The tools for necessary in creating the dot inlay are a bit for boring the holes to be inlaid with a dot, and a cutting tool to produce the dots. I have a set of center bits, a historic boring tool that is a perfect candidate for boring the shallow holes for the dots. The tool to cut the bits could be easily produced so I’ll begin here and continue work on making the tools that prepare the stringing and cut the channels for it. (For demonstrations and restoration work while working at the PMA, I used a set of the Latta/Lie-Nielsen tools Steve donated to the museum.)
Today’s woodworkers would likely lean towards the use modern brad point bits to bore the holes to inlay dots. These are made to be used in a mechanized drill press or power drill, obviously not a choice for pre-industrial joiners.

Early eighteenth century woodworkers had several ways to bore holes including spoon, (also known as shell bits), nose bits, and center bits. Center bits would be the obvious choice as they unrivaled in producing shallow round borings by hand. They are easier to accurately place on the work than spoon or nose bits due to the center spur from which it gets its name. Center bits appear in probate inventories of joiners working in early eighteenth-century Philadelphia including that of Charles Plumley whose four center bits are listed on the same line as his “dott bit.”
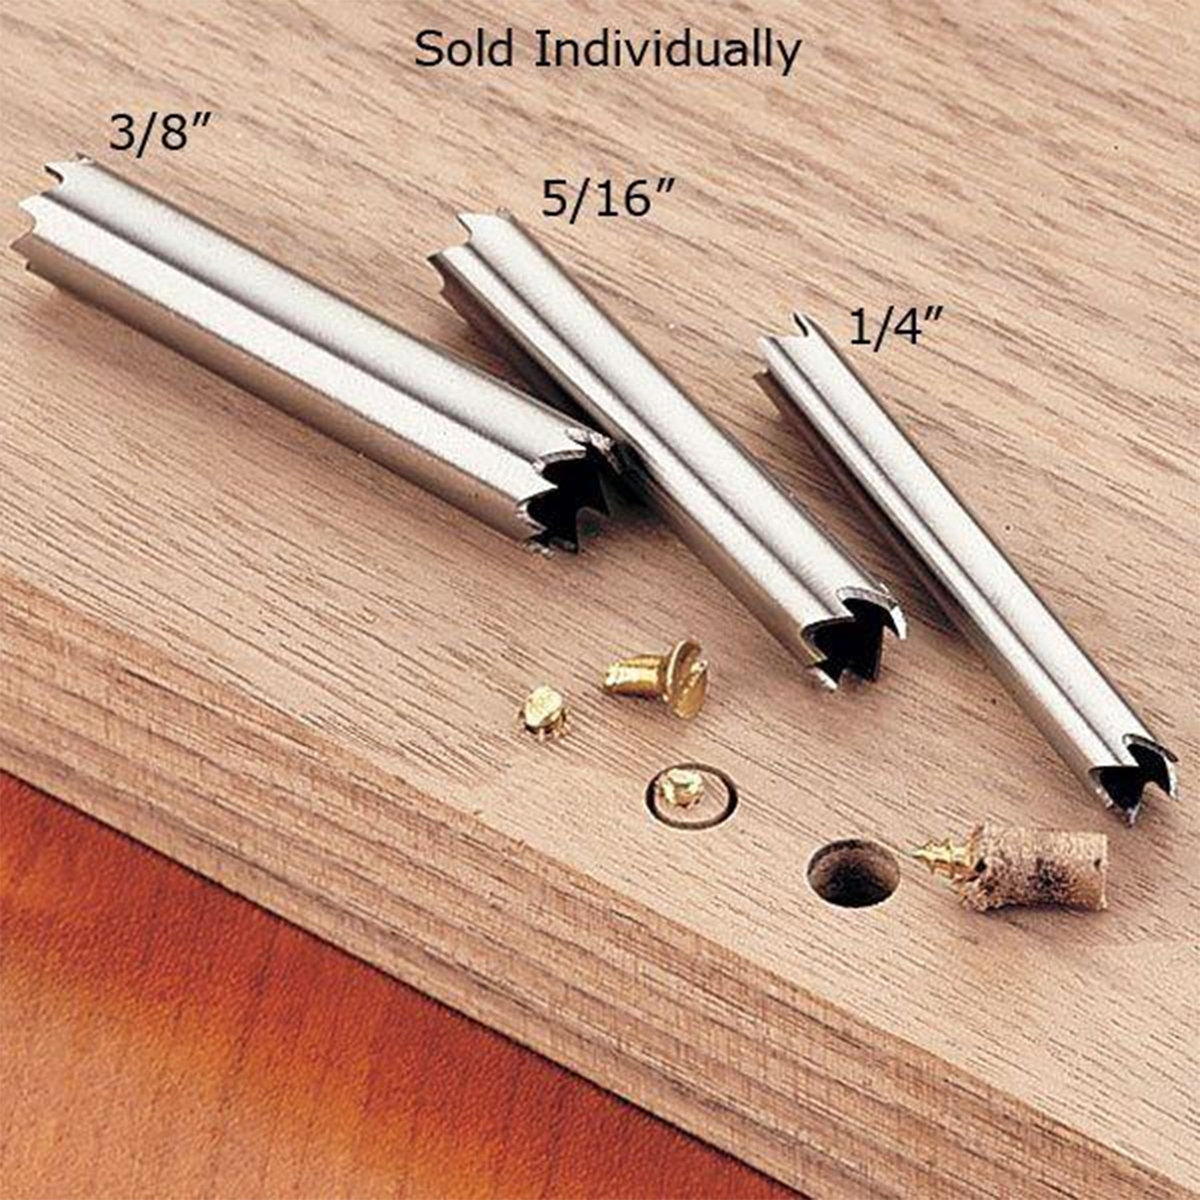
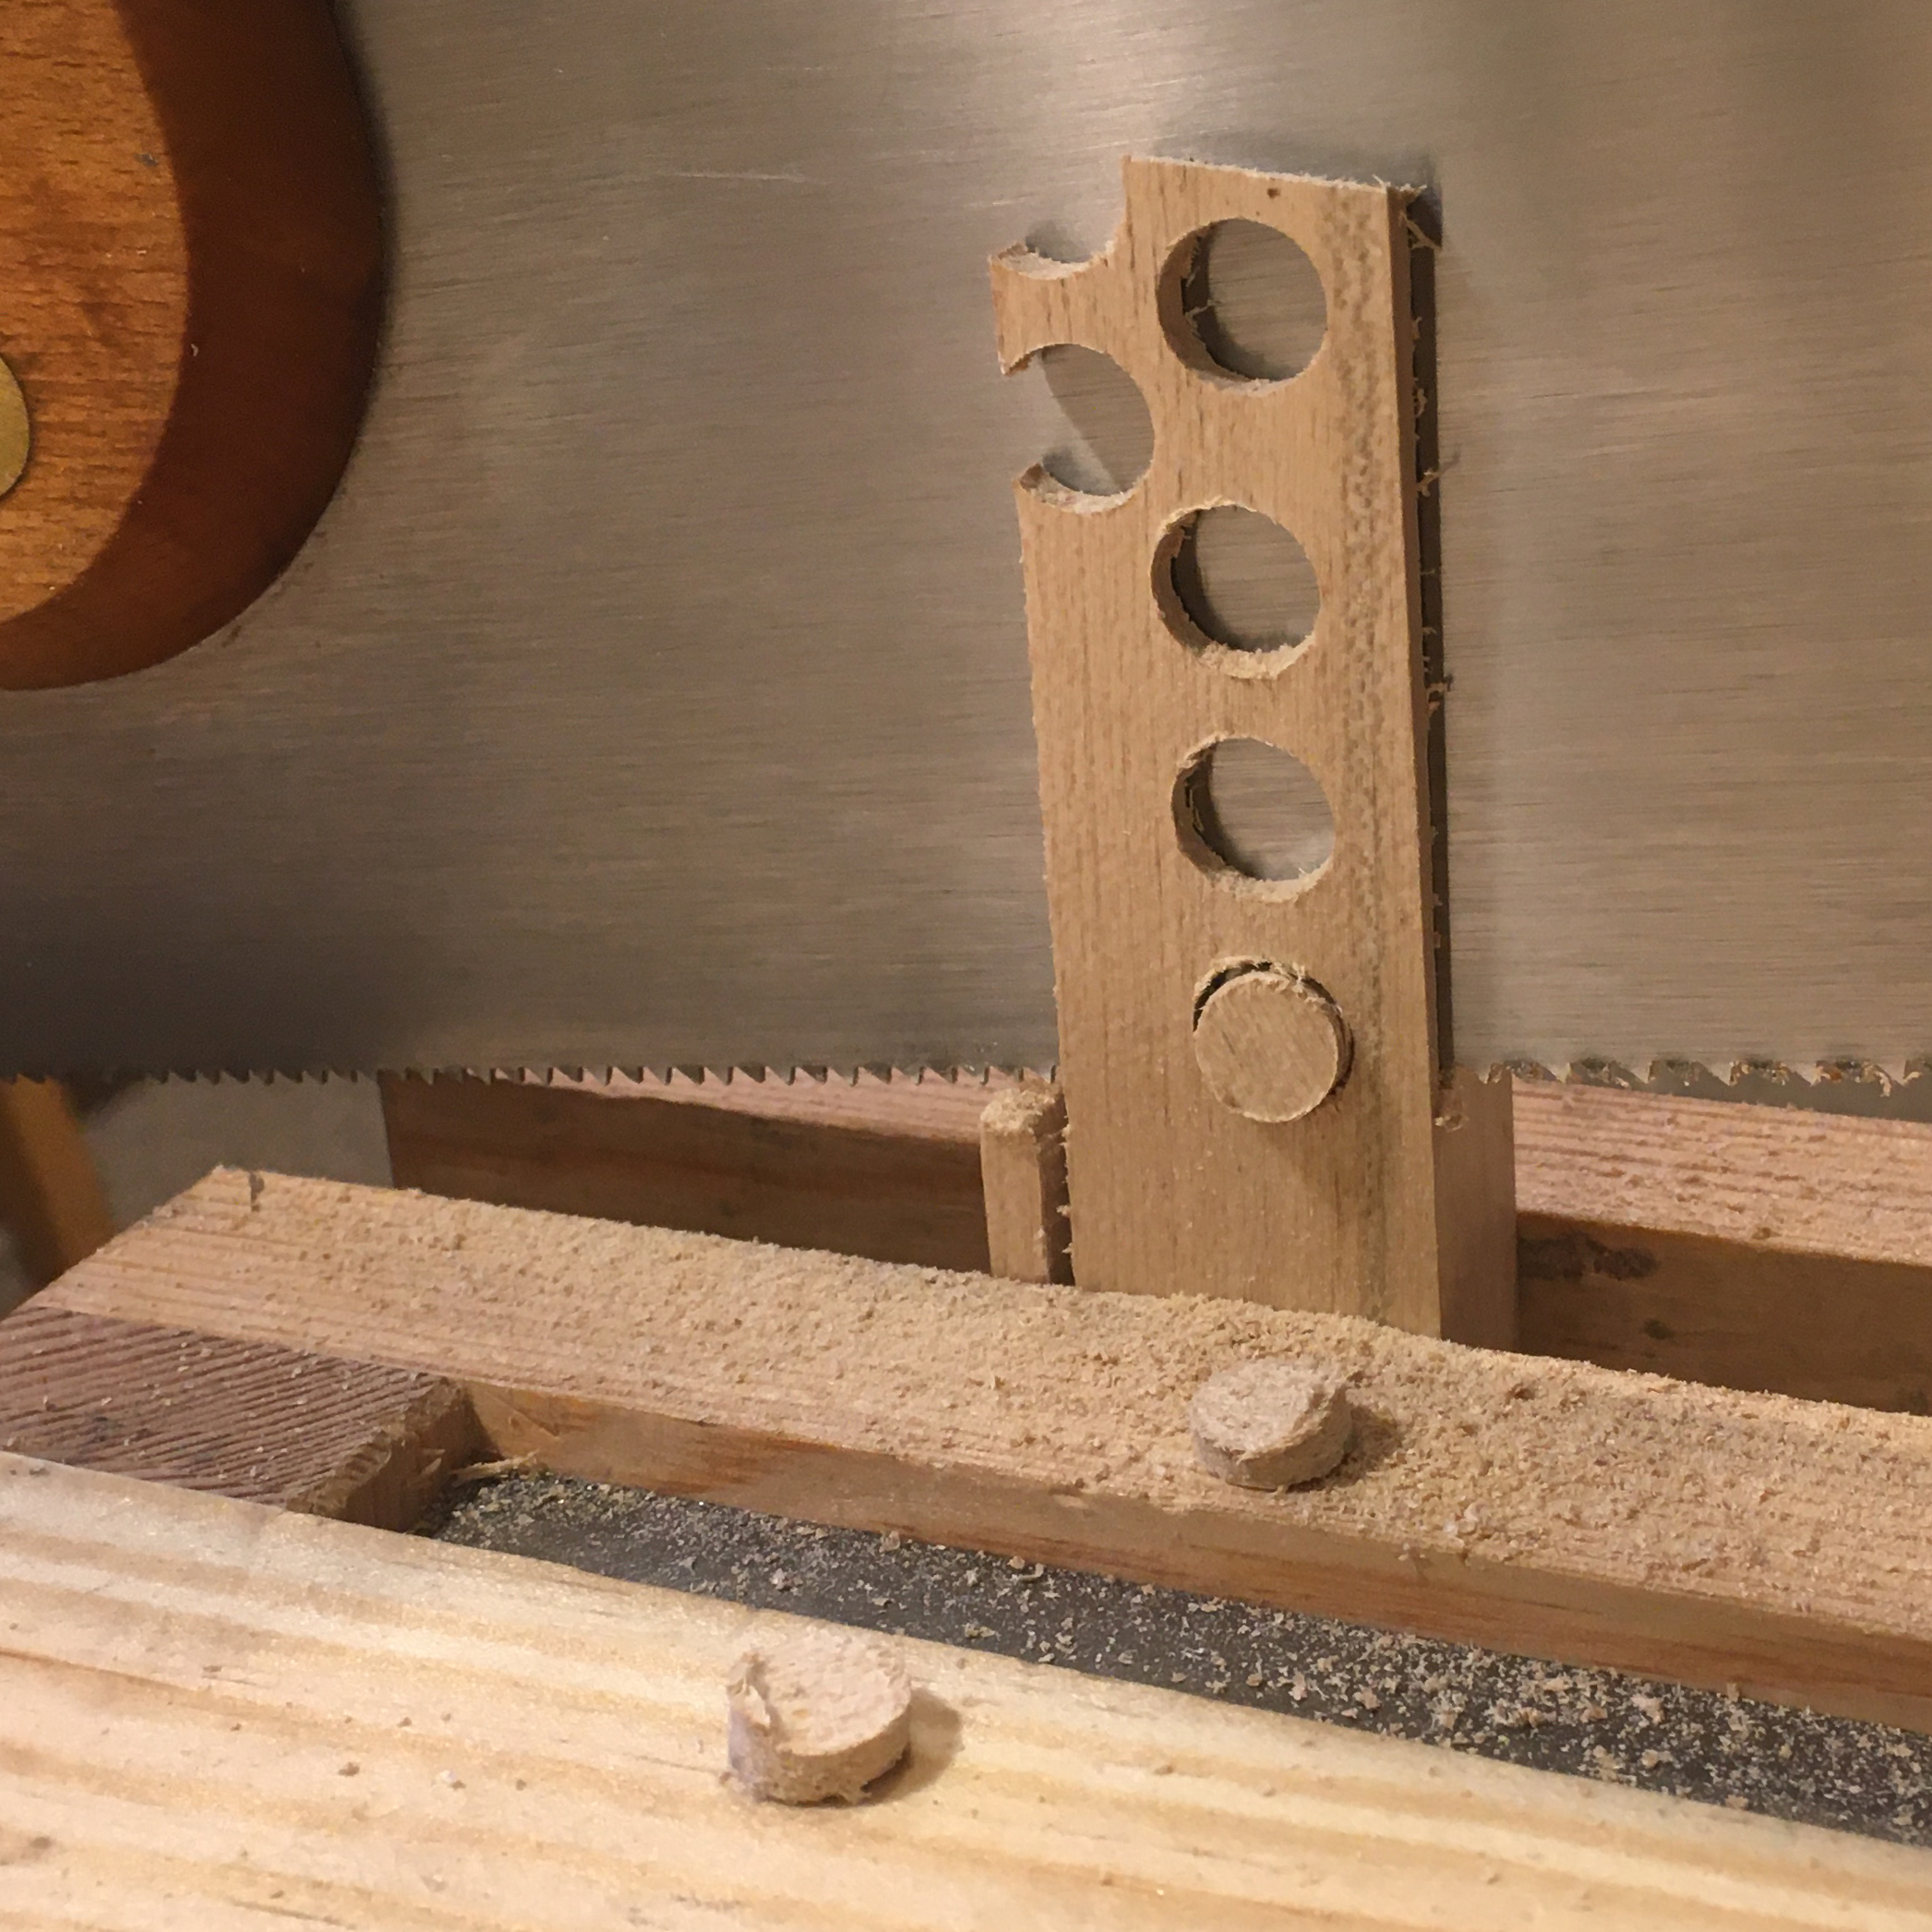
This brings us to the second tool needed to produce dot inlays, another boring tool that instead of removing wood to create a hole, bores a thin circle in the wood to produce a dot that can be inlaid. The boring tool that creates the hole and the tool that cuts out the dot must be sized so that the dot produced fits snugly, but not too tightly, into the bored hole. A modern woodworker might reach for a plug-cutter or possibly a screw extractor bit. Plug-cutters must be used in a drill press, and screw extractors are used in a power drill.

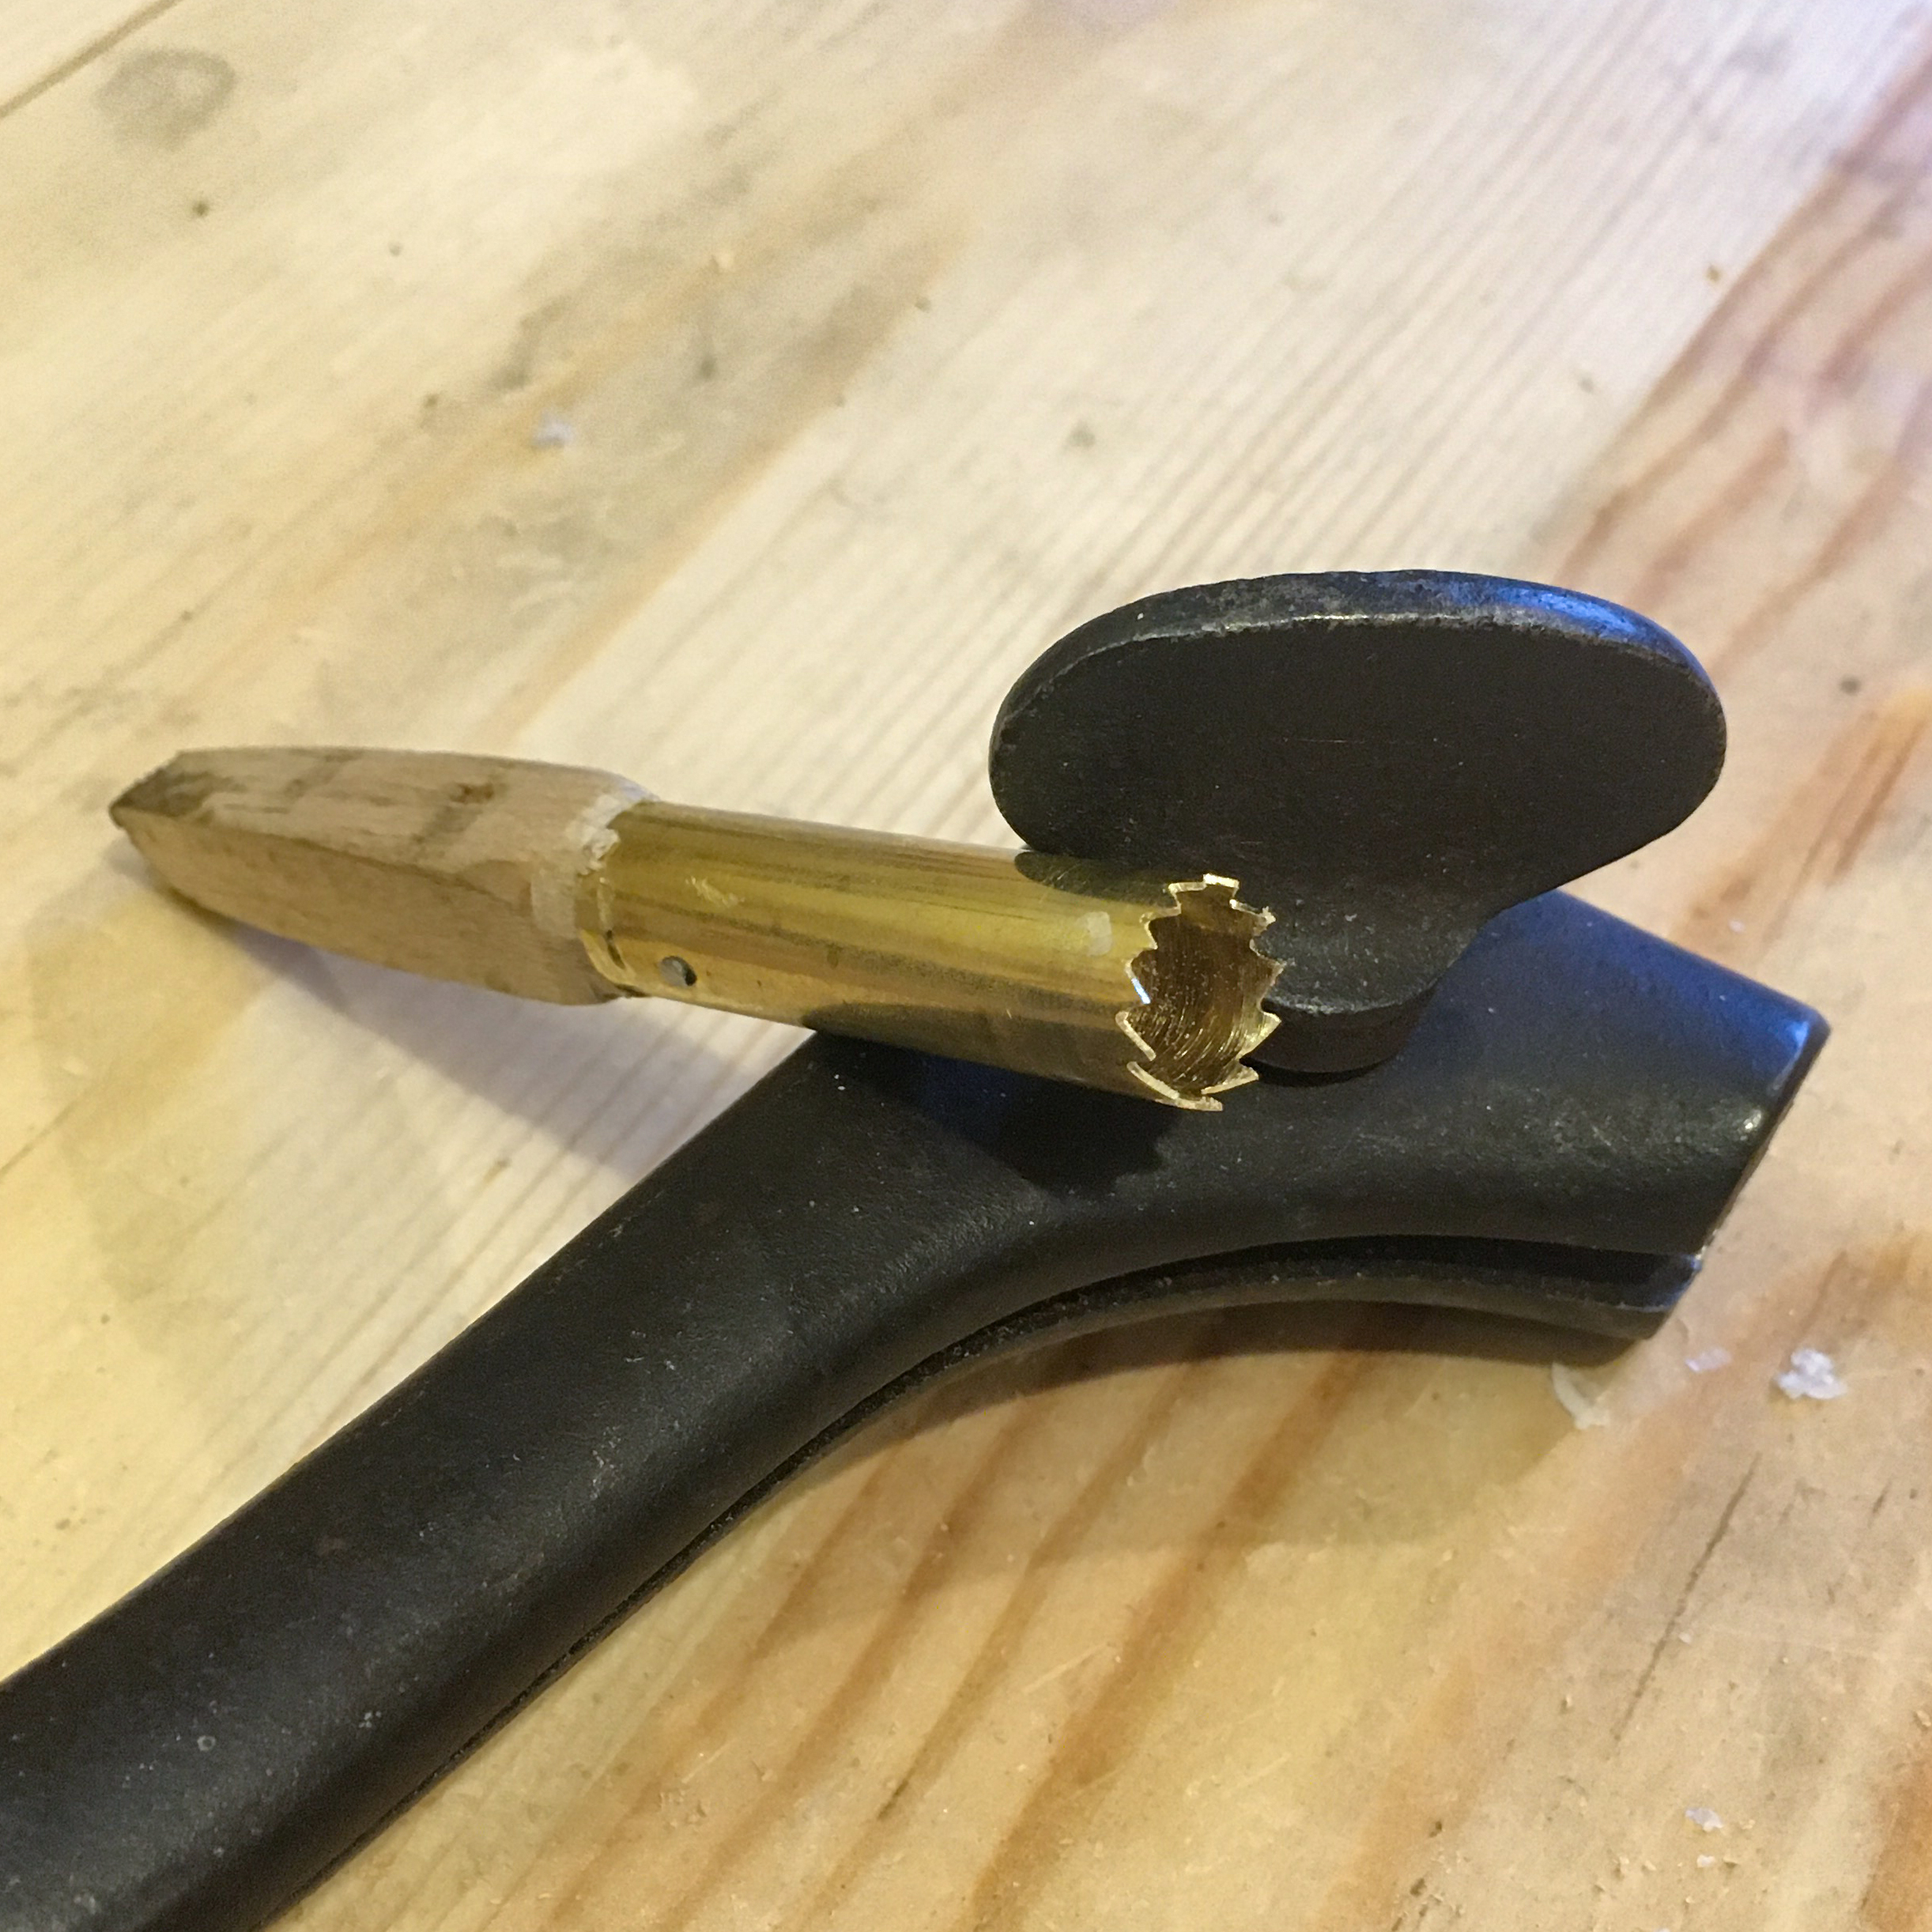
While we can’t know precisely what Plumley’s “dott bit” looked like, the tenon cutting bits in the Dominy shop at the Winterthur Museum could also easily be used to produce dots. They consist of tubes of iron with cutting teeth filed on one end with a square, tapered length of wood at the other end that fits in a brace turned by hand.

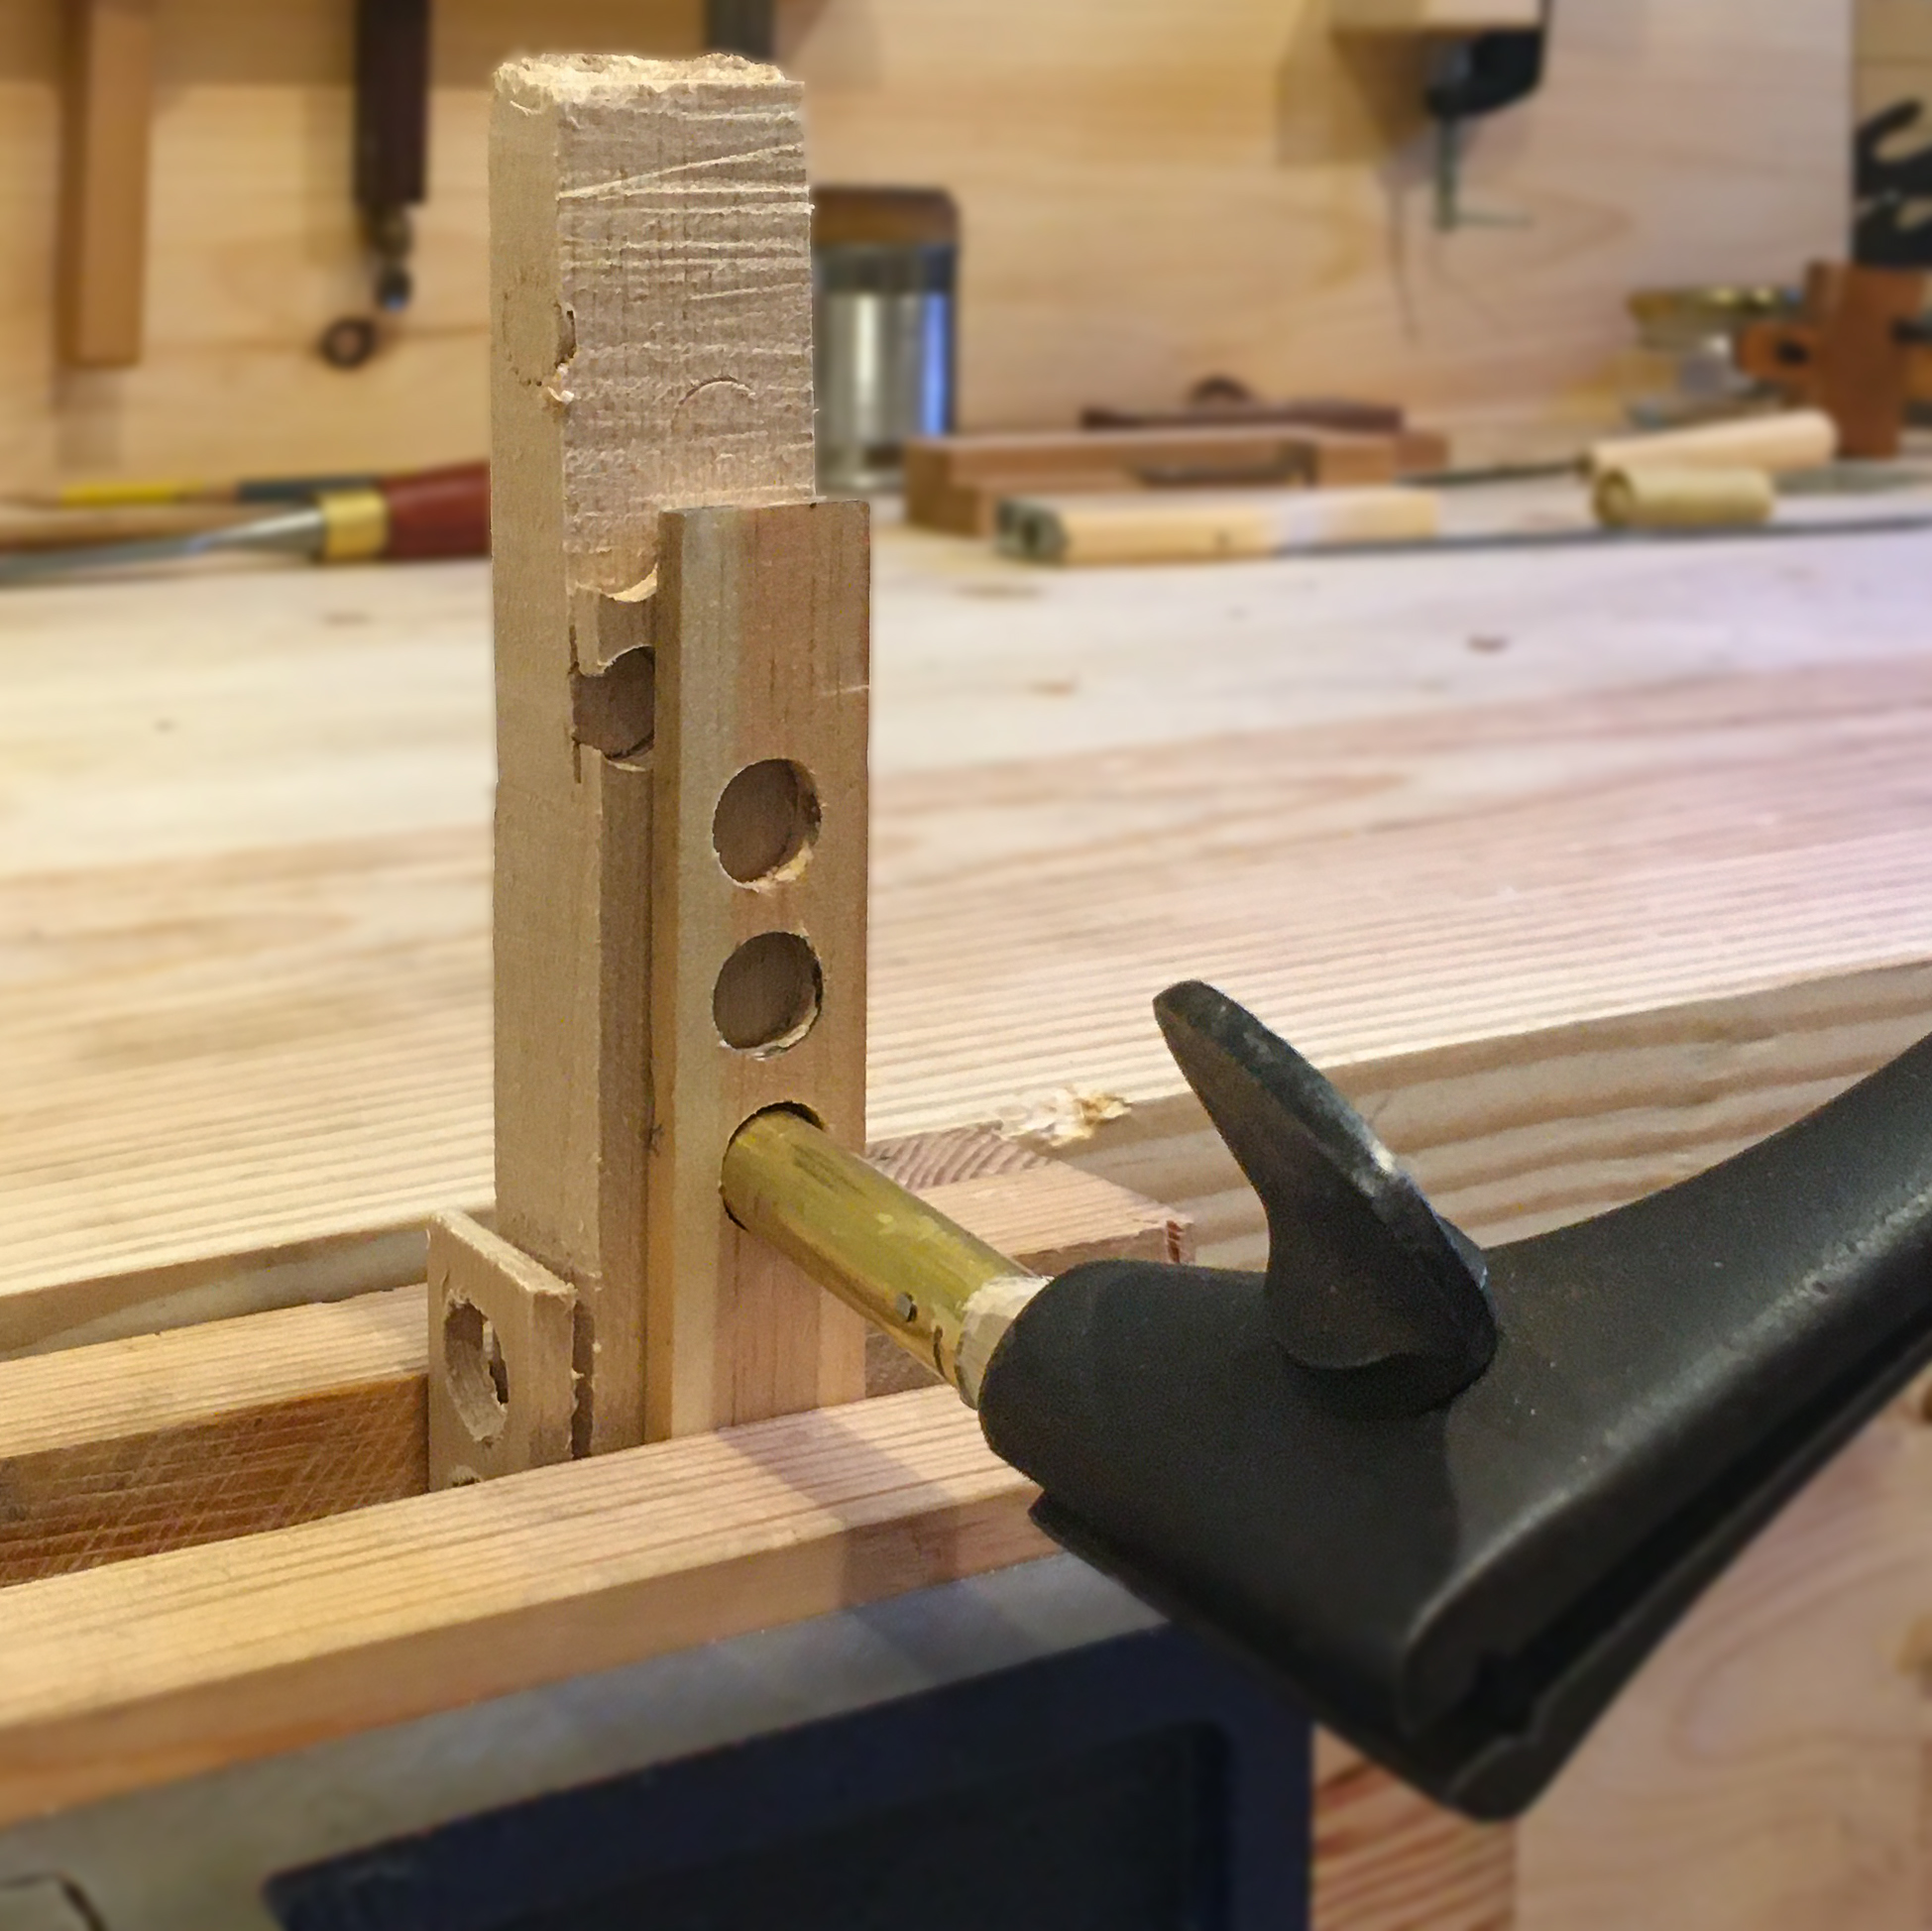
Pre-bored guide blocks must be used with modern screw extractors, and we need to do the same with hand-made dot bits.
The objects with clusters of four inlaid dots can be divided into two groups based on whether the dots overlap one another or not. The four dots in a cluster on the chest-on-stand, the box in the du Pont collection, the Dieterich American Foundation desk, and the spice box do not overlap.
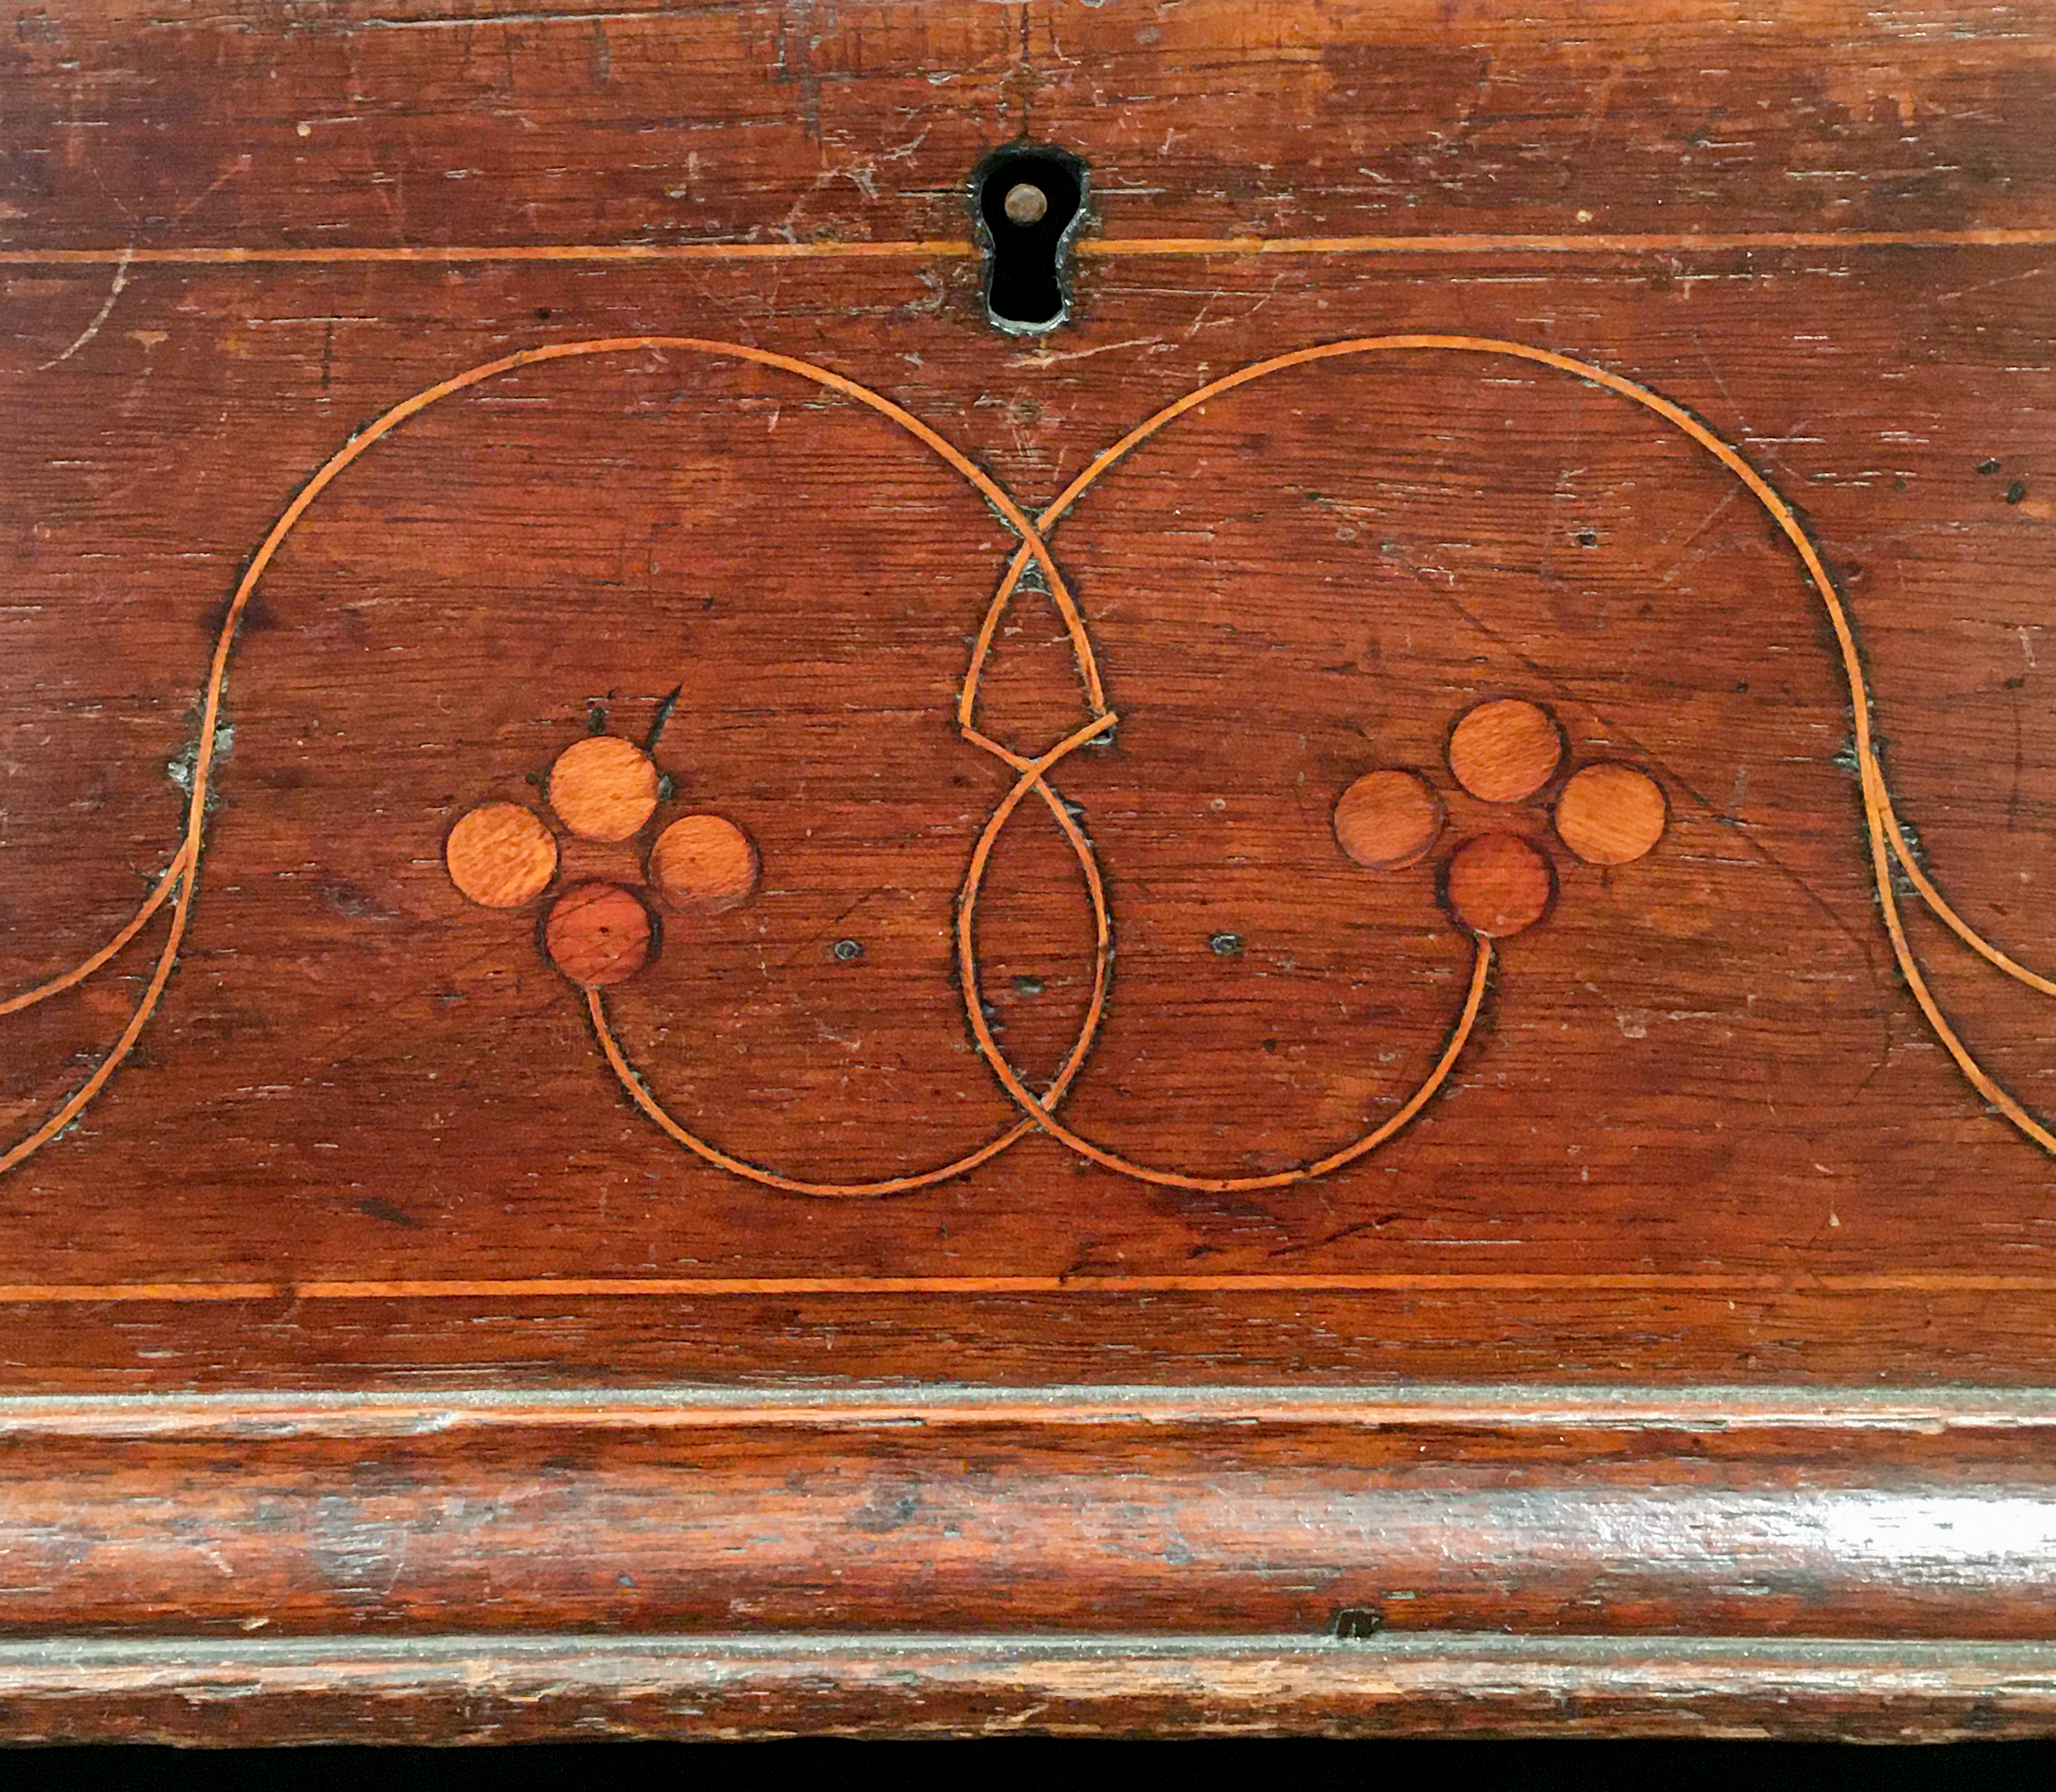
The four dots overlap on the two-part chest of drawers in the du Pont collection, the chest of drawers in a private collection, and the box at Winterthur. The procedure for inlaying the dots varies slightly because of these two distinct approaches to dot orientation.

Next: Inlaying Dots Part II
