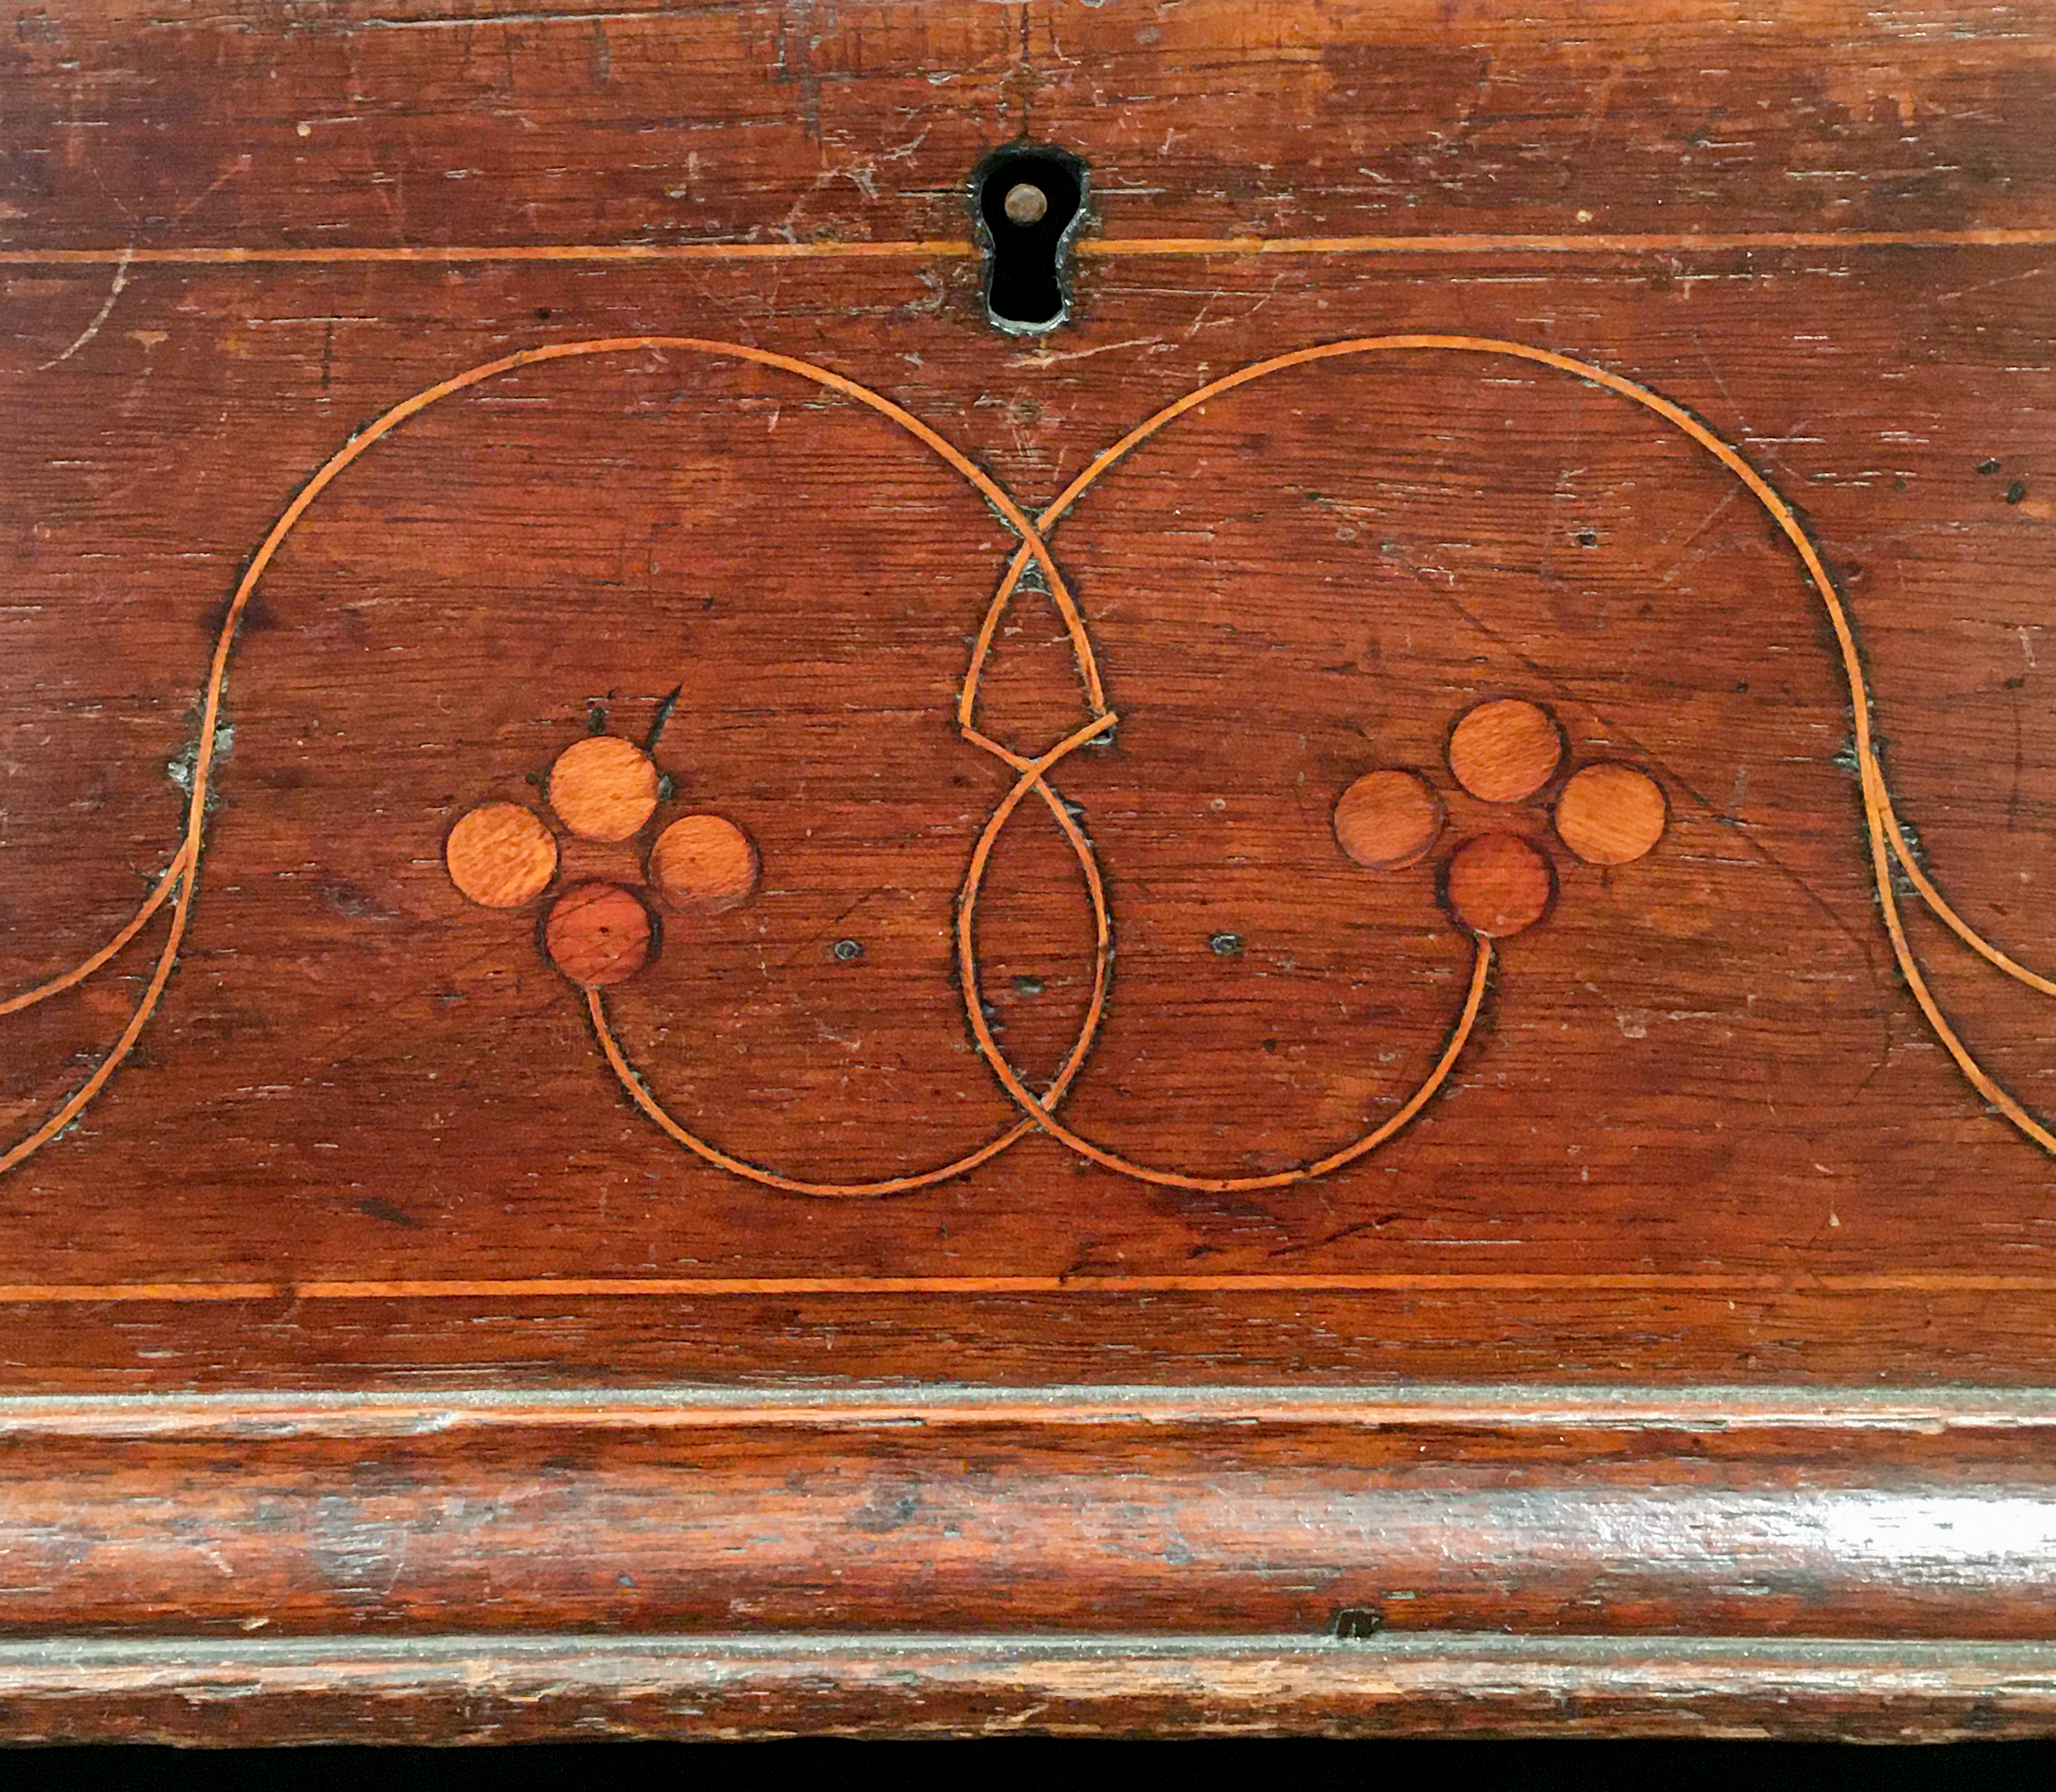
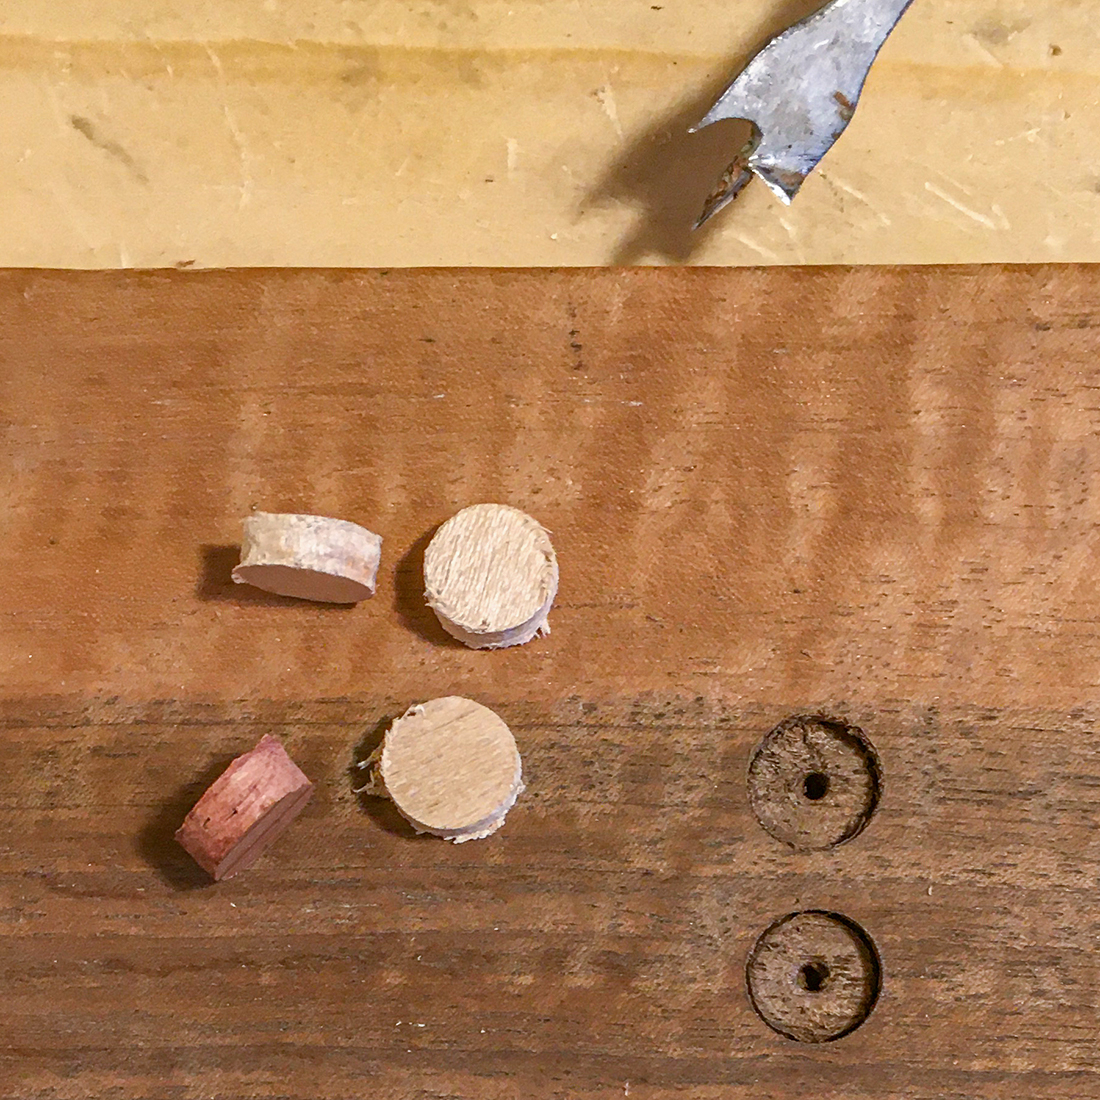
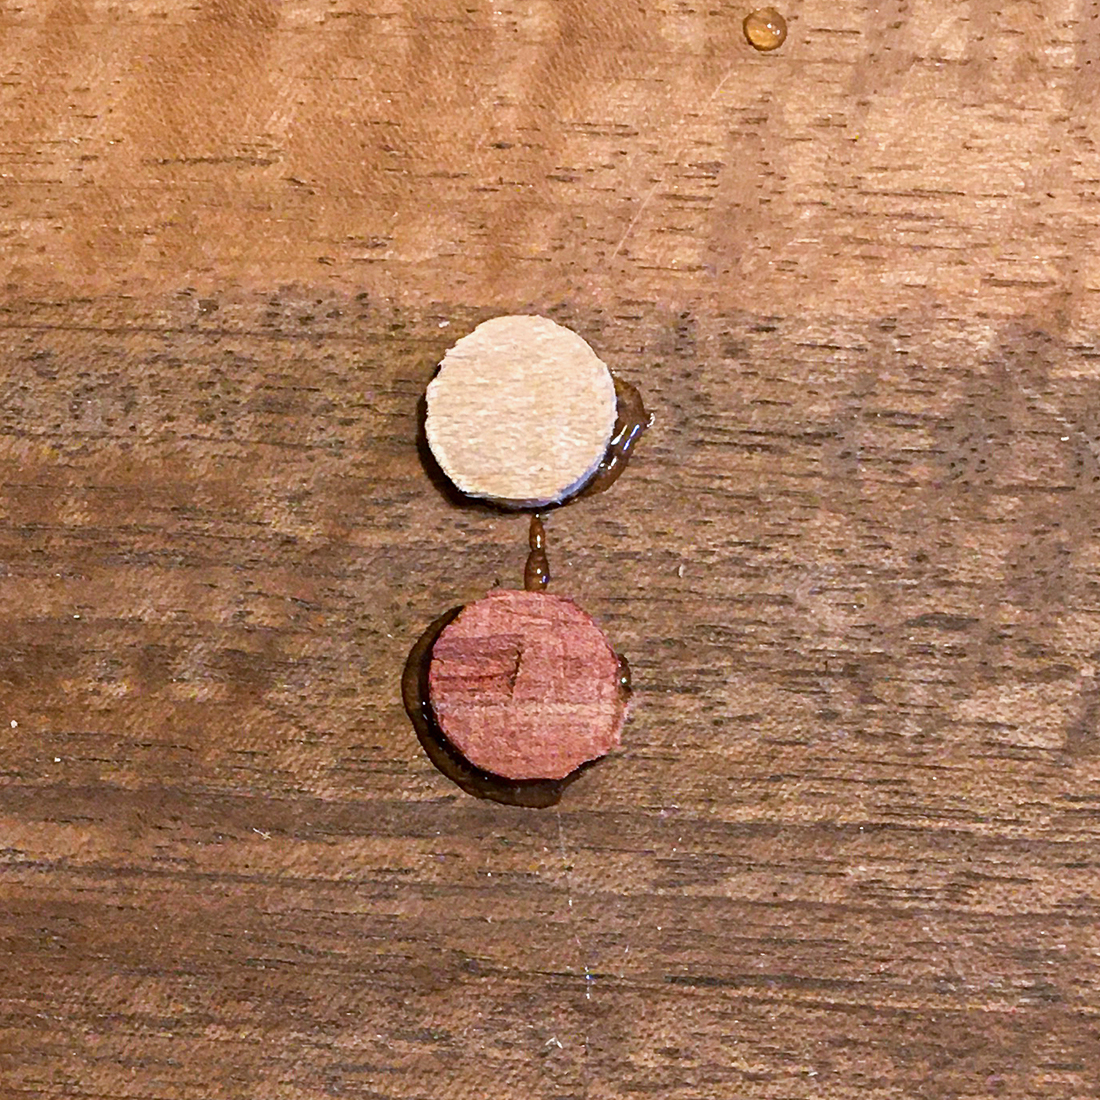
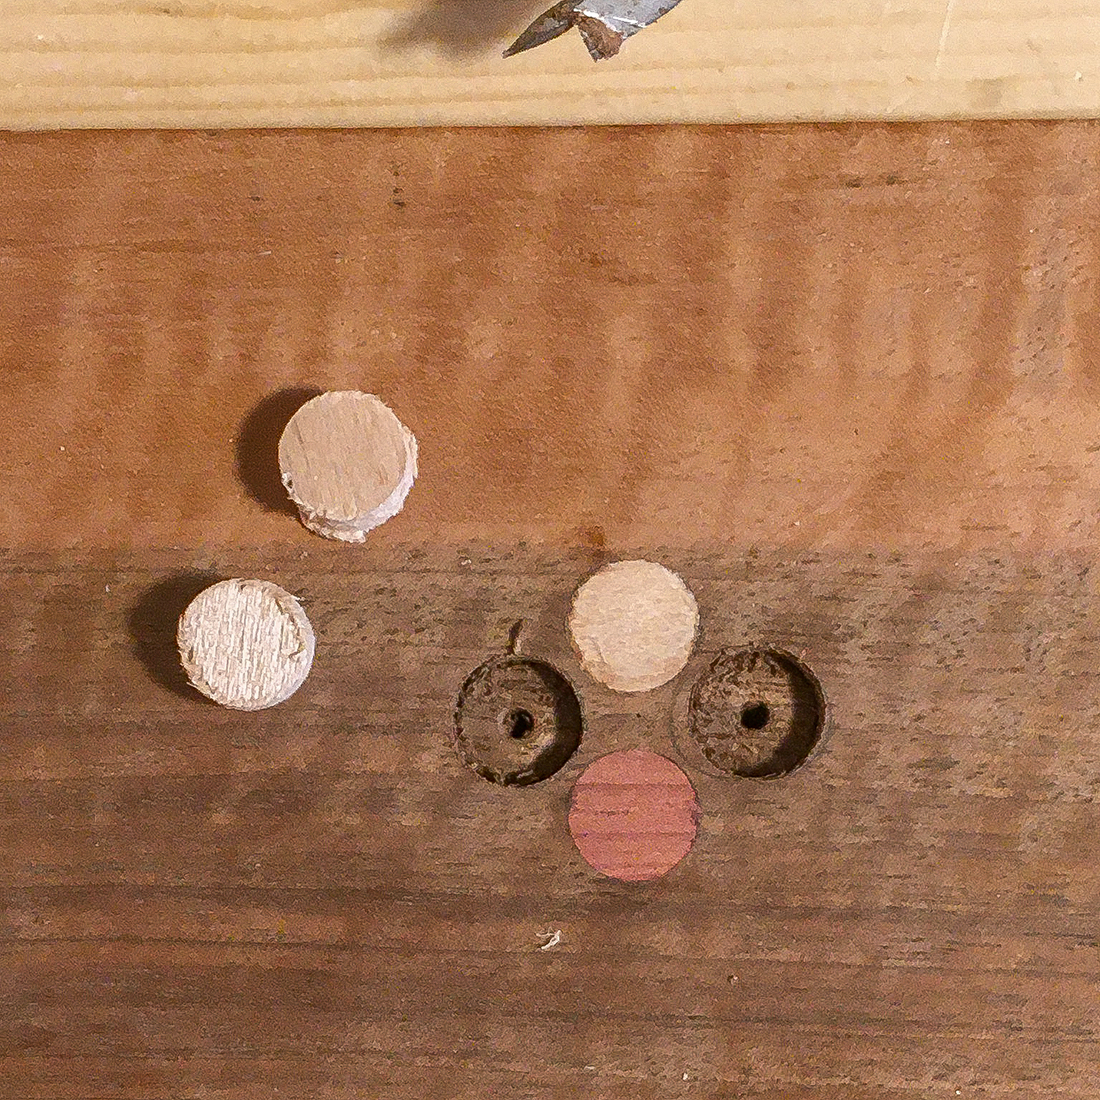
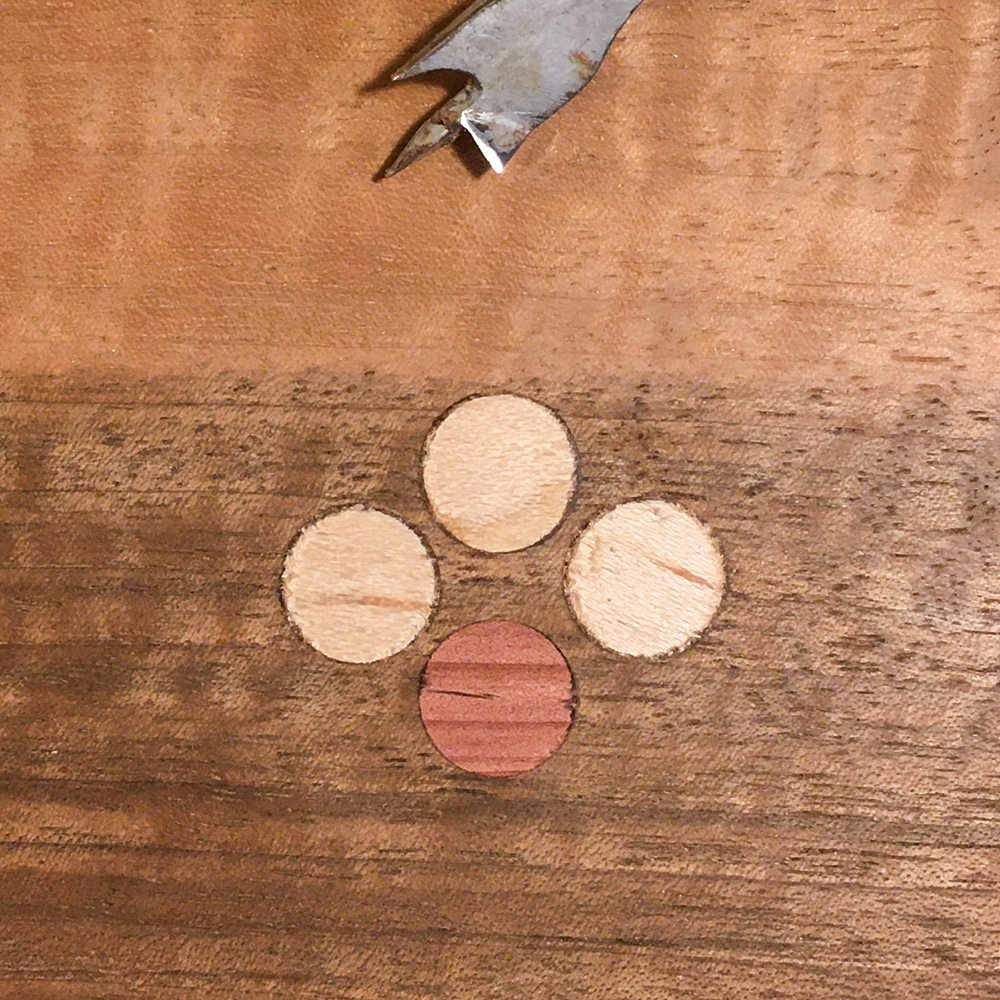
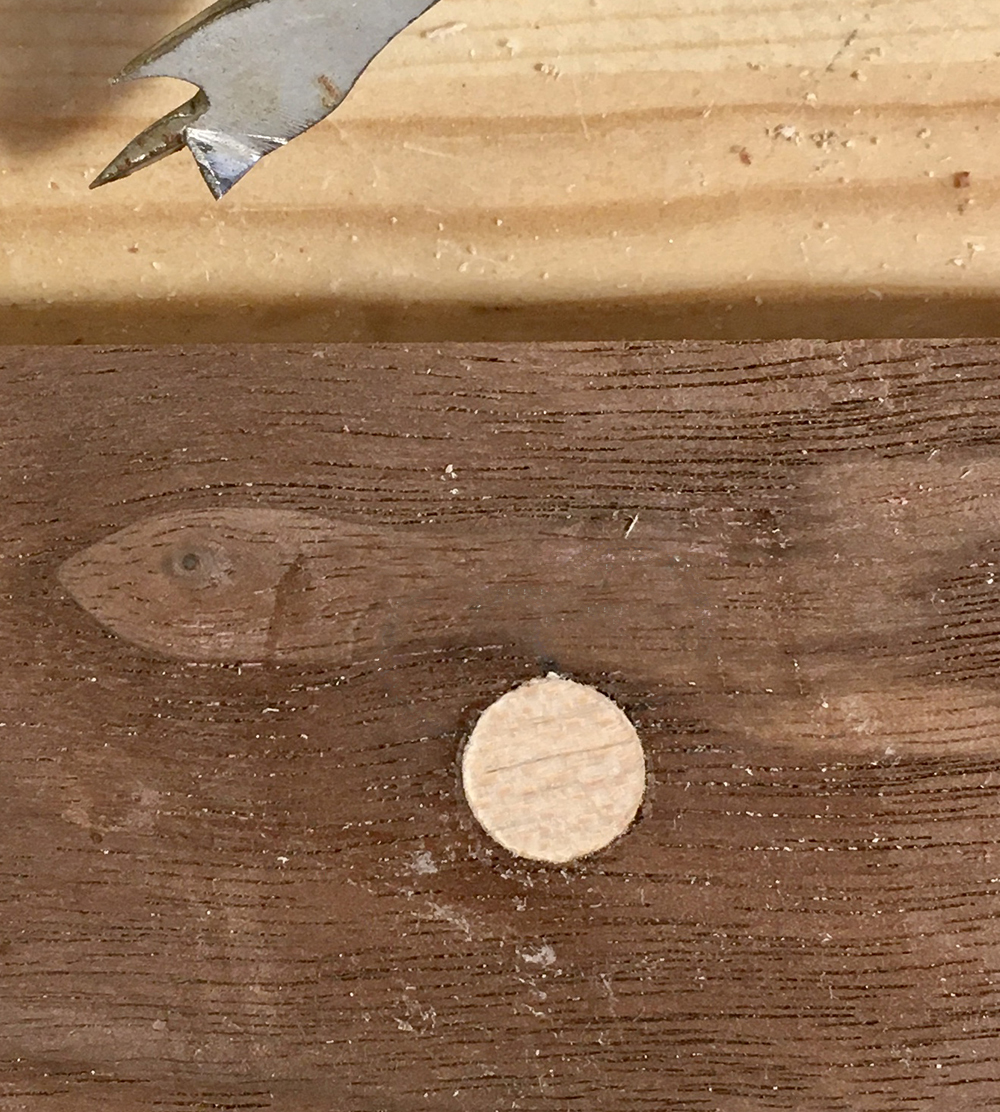
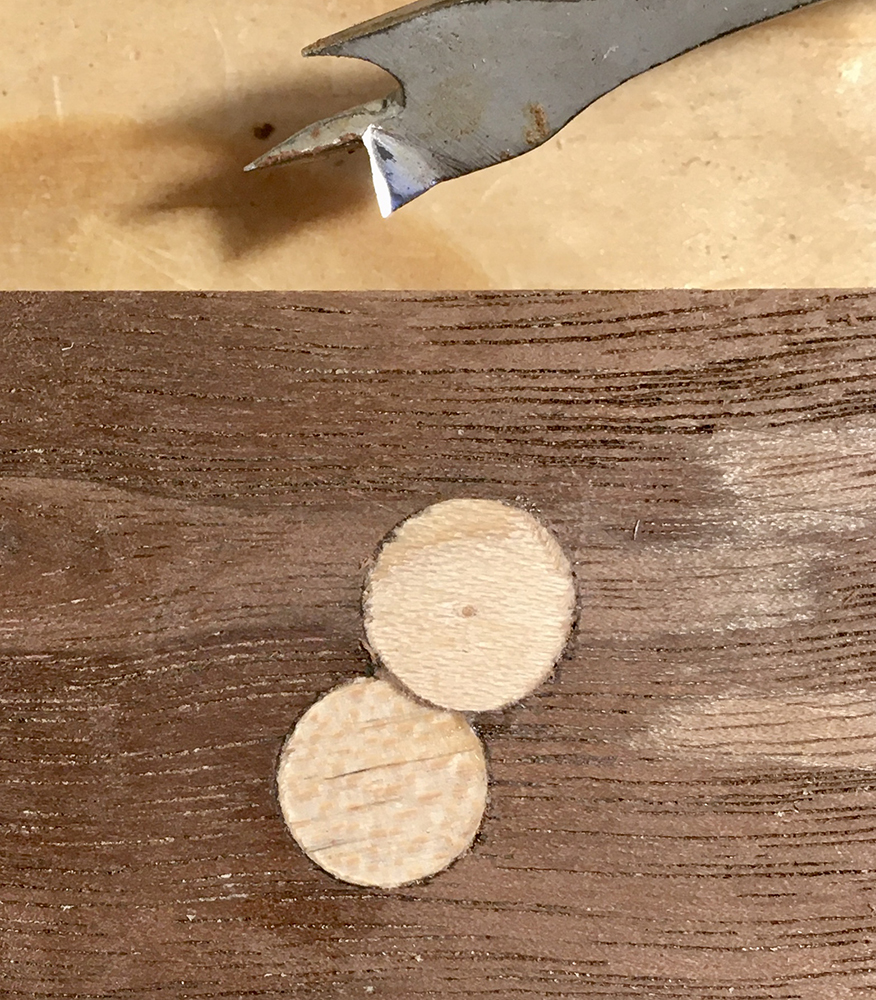
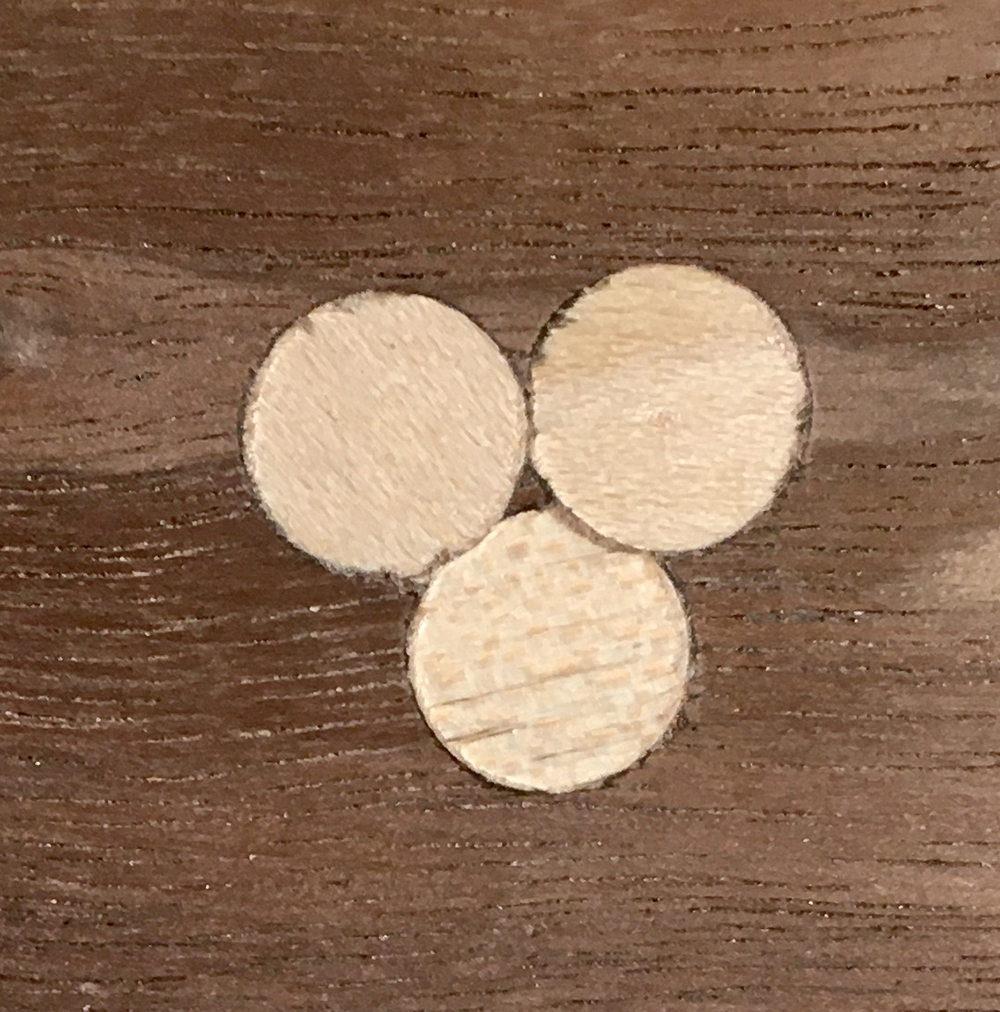
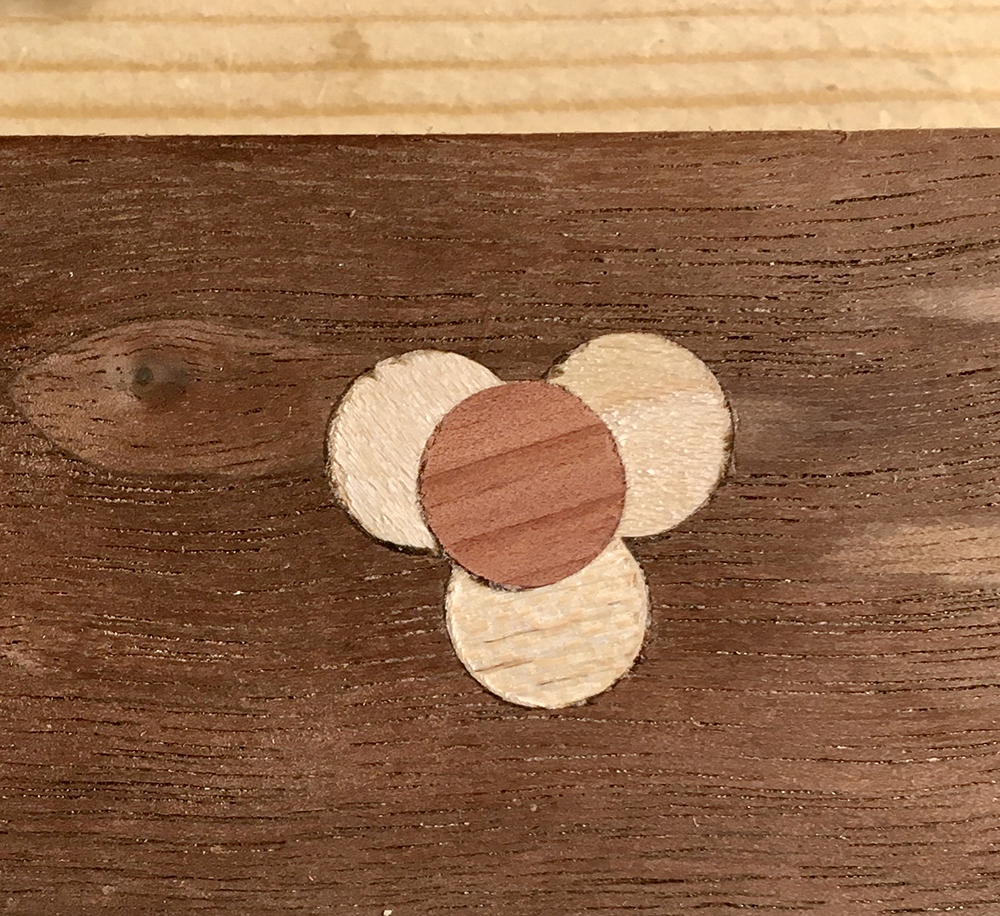
A detail of the box from the William K du Pont collection. The box, the chest-on-stand from the same sale, and the desk in the collection of the Dietrich American collection can all be attributed to the same shop based on similarities of the inlay design. There are 46 inlaid dots on the top, front, and sides of the box. The chest-on-stand has 80 inlaid dots on the drawer fronts and 34 dots inlaid on the top for a total of 114 inlaid dots overall.There is variation in the alignment of the clusters four dots as the boring of the holes is done by eye in 18th century work, but the general positioning aimed for has the vertically aligned dots separated by the radius of a dot. The dots on the horizontal line are spaced the diameter of one dot apart. These clusters must be inlaid two at a time. Boring all four holes at once would weaken the wood around the boring and create the possibility of short-grain breaks. Here, the first two holes are bored with a center bit and brace for maple and red cedar dots.Hide glue is used to secure the dots. The dots sit slightly above the surface of the black walnut board.When the glue has cured, the dots are pared flush with the surface and a second set of holes are bored for two maple dots. Hot hide glue cures relatively quickly. By the time you have finished gluing two dots in all the clusters of four across your drawer fronts say, the first dots inlaid would be ready to be pared flush with the surface.The second pair of dots completes the cluster of four.The clusters of four dots inlaid on the two-part chest of drawers in the William K. du Pont collection are arranged differently. A single red cedar dot overlaps three maple dots that just touch or slightly overlap. There are 128 dots inlaid on the drawer fronts and 53 on the top for a total of 181 dots inlaid overall. Since all of the dots overlap in this pattern, the dots must be inlaid one at a time to avoid short-grain breaks.Boring for the second dot. The areas of walnut that form peaks where the borings overlap would be at risk of breaking away if both holes had been bored at the same time.The second dot inlaid and pared flush with the surface.The third dot is inlaid and pared flush. The small triangle of walnut in the middle of the dots is where the central point of the center bit is placed to bore the fourth hole for the red cedar dot. The center red cedar dot is inlaid and completes the four dot cluster.
What still images cannot show is the nature of the labor or speed of the actions in real time. Inlaying dots certainly can go more quickly that inlaying even simple petal forms, but the sheer number of dots and the time necessary to inlay only one or two at a time, combined with the more exacting and technically challenging light-wood stringing on these objects, gives some indication of what it meant for a consumer to order a fully inlaid line-and-dot object and the challenge for a joiner who received the commission.
Interesting that the Dots when overlapping had to be glued & dry before drilling the next to prevent tear-out, makes perfect sense though. I am looking forward to the Line inlay post and how that was done.
Hot hide-glue has a very a tack and cures quickly so there is not a great time gap between when a dot is glued in a boring and when you can level the dot before boring for the next. Same thing will apply for stringing. Where stringing overlaps, one line is glued in and left to cure, then cut or scraped flush before the overlapping stinging trough is cut in. When in examining original objects you can determine the order of inlay by what line overlaps another.
Thanks for posting these, Chiris. Lost of good info. And yes, you are right about all the time involved in work like this.
Thanks Kirk. I will get to the stringing part of the story but my plate filled up over the last couple of weeks!
NO RUSH! on the string inlay, take your time.
For someone interested in historical construction details, your posts are a joy to read.